Learning Goals
Masks will be covered in detail in Chapter 6. For now, let’s focus on mastering just two key skills.
a. Extracting the subject (creating a mask)
b. Attaching or applying the mask
Plain Text
복사
Workflow
Index | Workflow Name | Actionable Link | Summary |
4.4.1 | Mask by SAM | SAM is a basic module for creating masks. | |
4.4.2 | Mask Cut and Paste | It allows for basic cut-and-paste operations using the mask. |
a. mask (sam, rmbg, sam2)
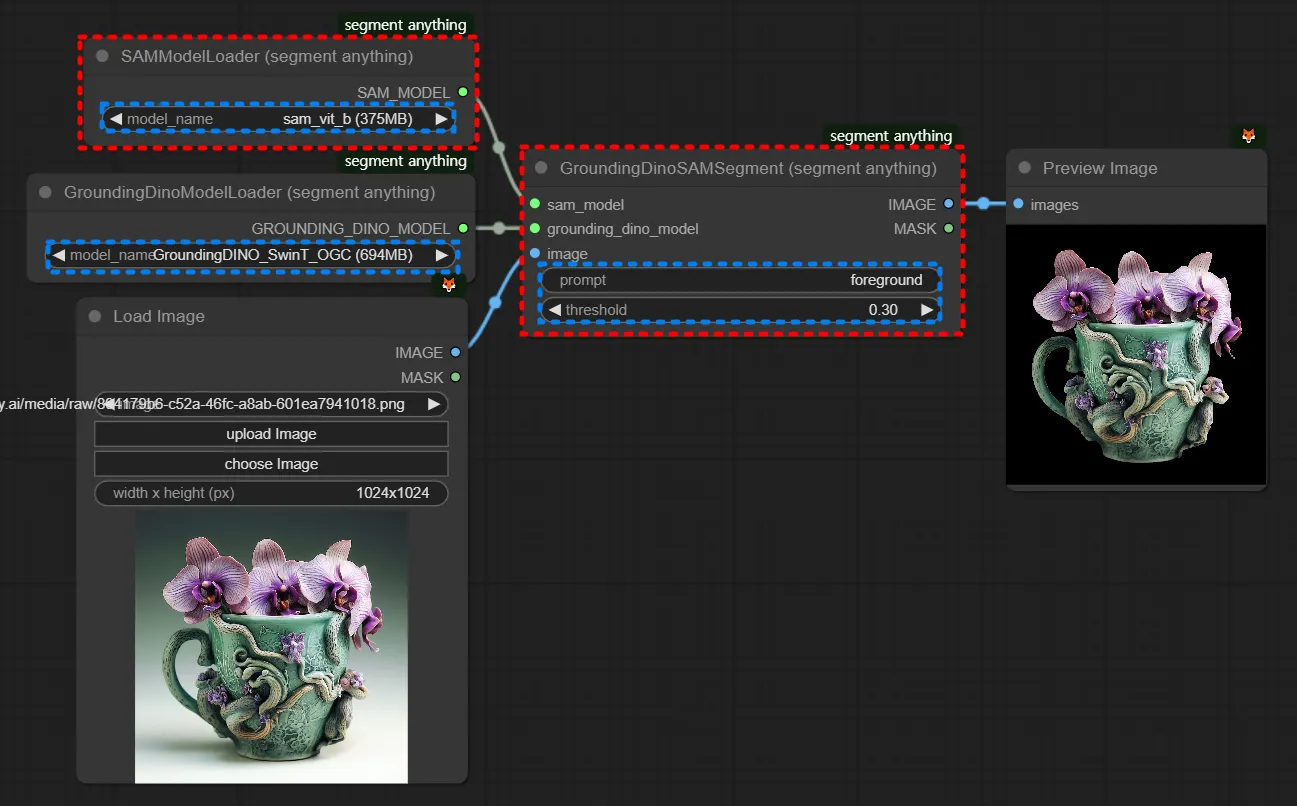
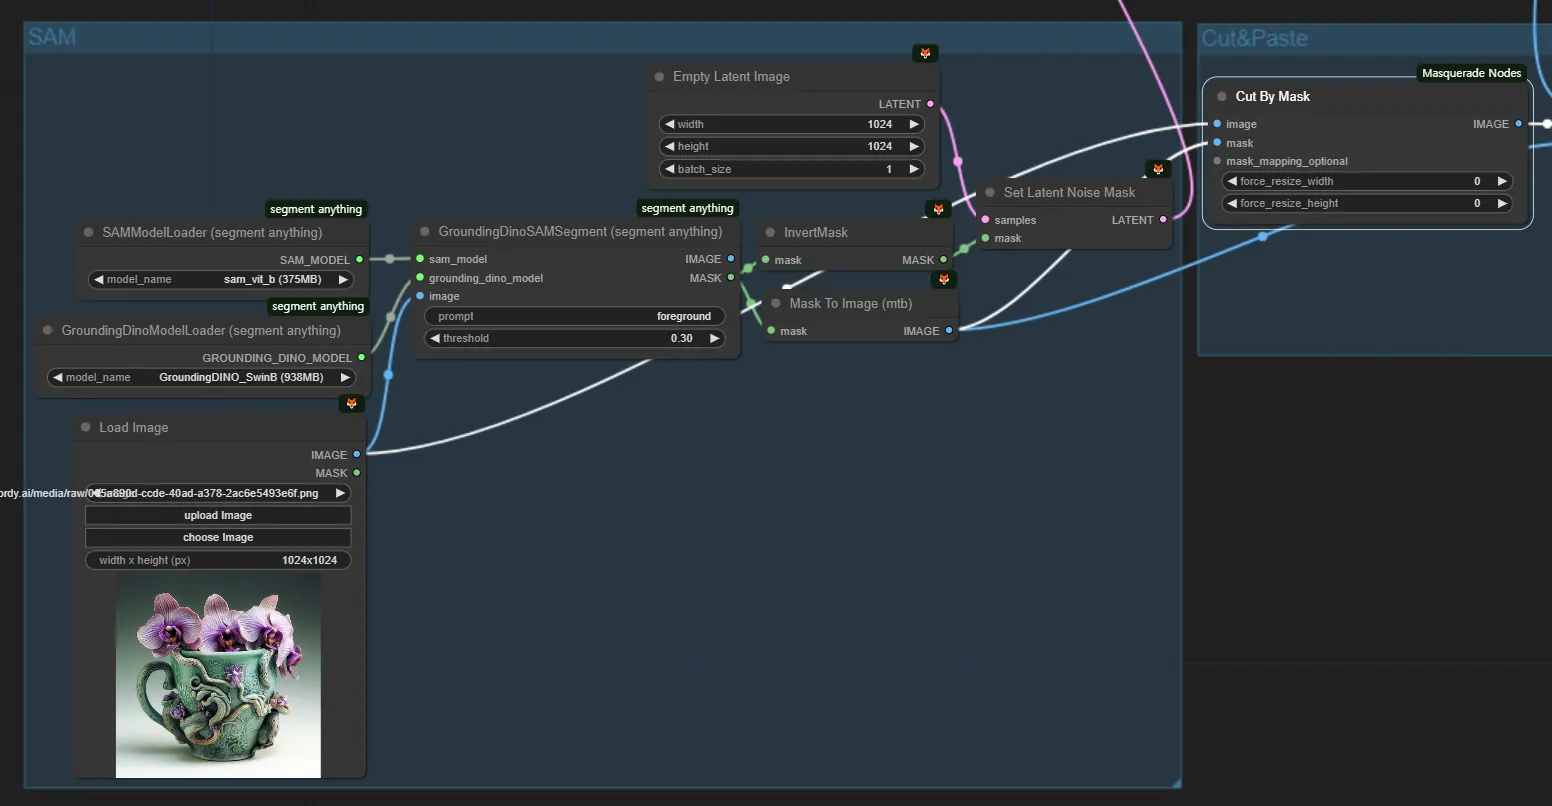
SAM (Segmentation Anything Model) is a model developed by Meta. It is used to create masks for image segmentation. You can use the provided module as-is.
The red components are essential, while the blue components are either adjustable or have minimal impact. In the prompt area, you should write the object you want to detect in English, but using "foreground" (as opposed to "background") will also work. The threshold value, for example, changing from 0.3 to 0.1 or 1, typically does not cause significant changes.
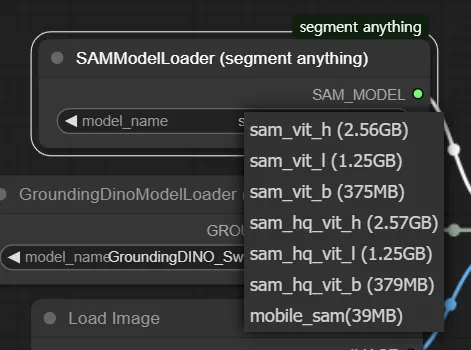
(SAM comes in various types, and we are using a smaller, more lightweight model that performs well in general situations. If quality is more important than lightweight operation, you may opt for a larger model. Note that using a larger model will increase the processing time.)
(There is a method to create masks using SAM, but you can also use models like RMBG-1.4 instead. While both serve similar purposes, RMBG-1.4 focuses on removing the background rather than the foreground, which means the implementation details differ slightly from SAM.)
b. cut and paste
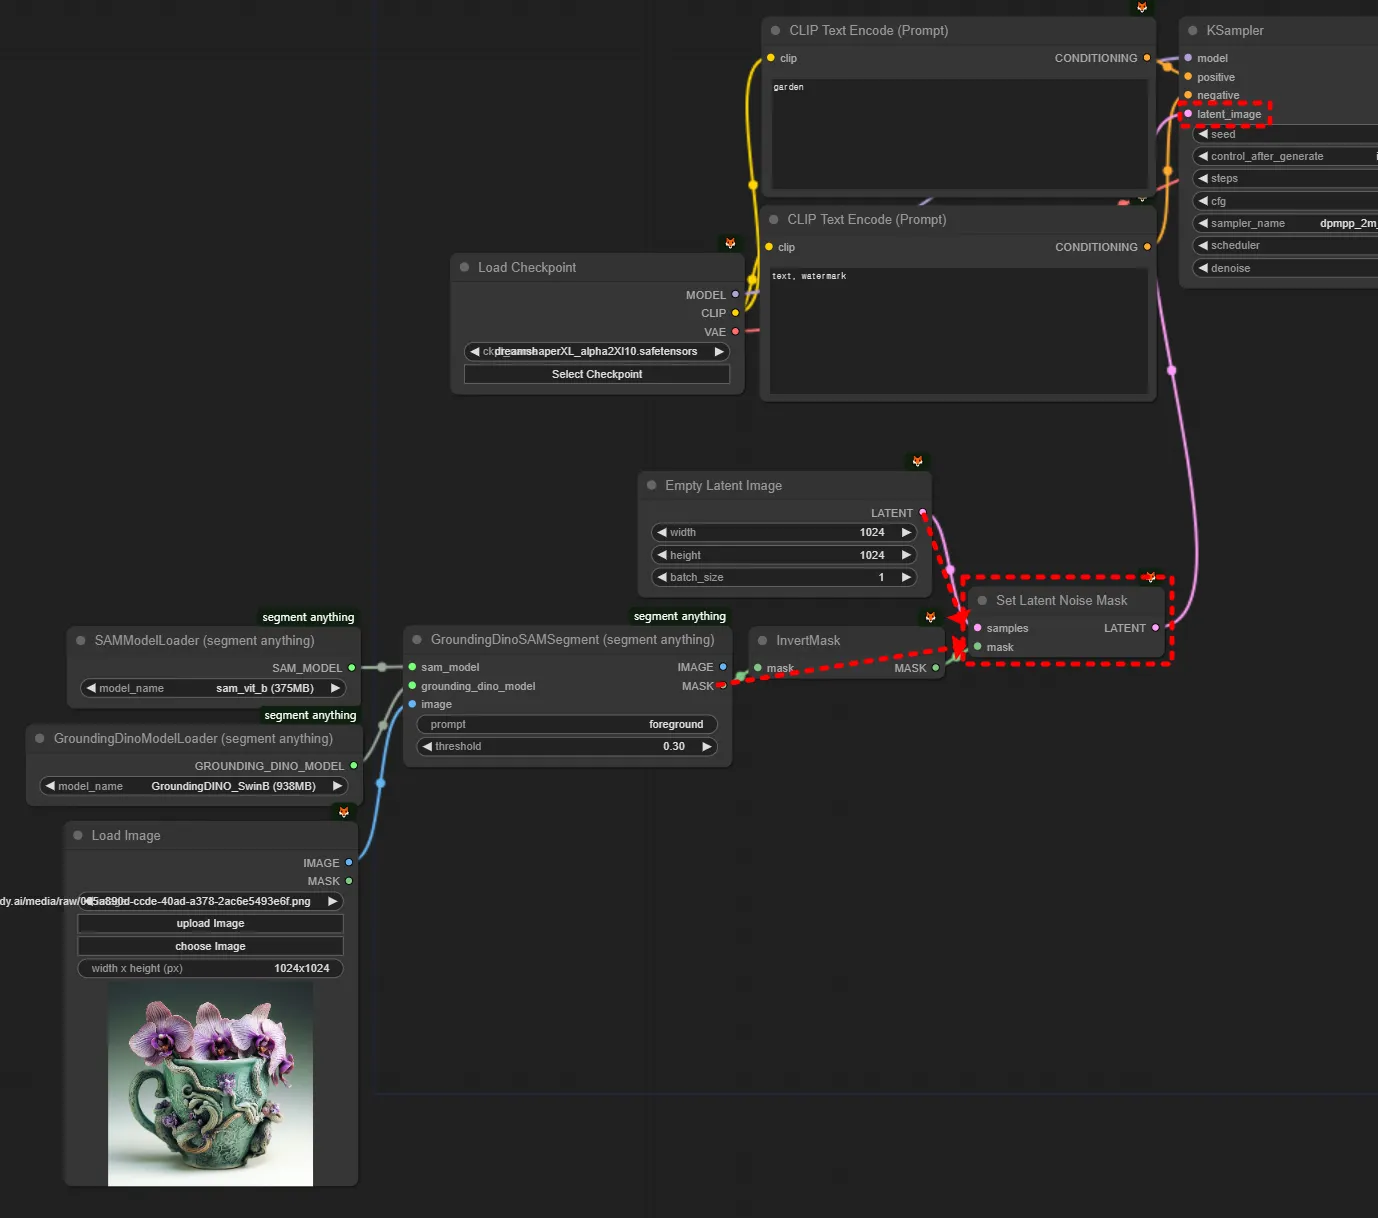
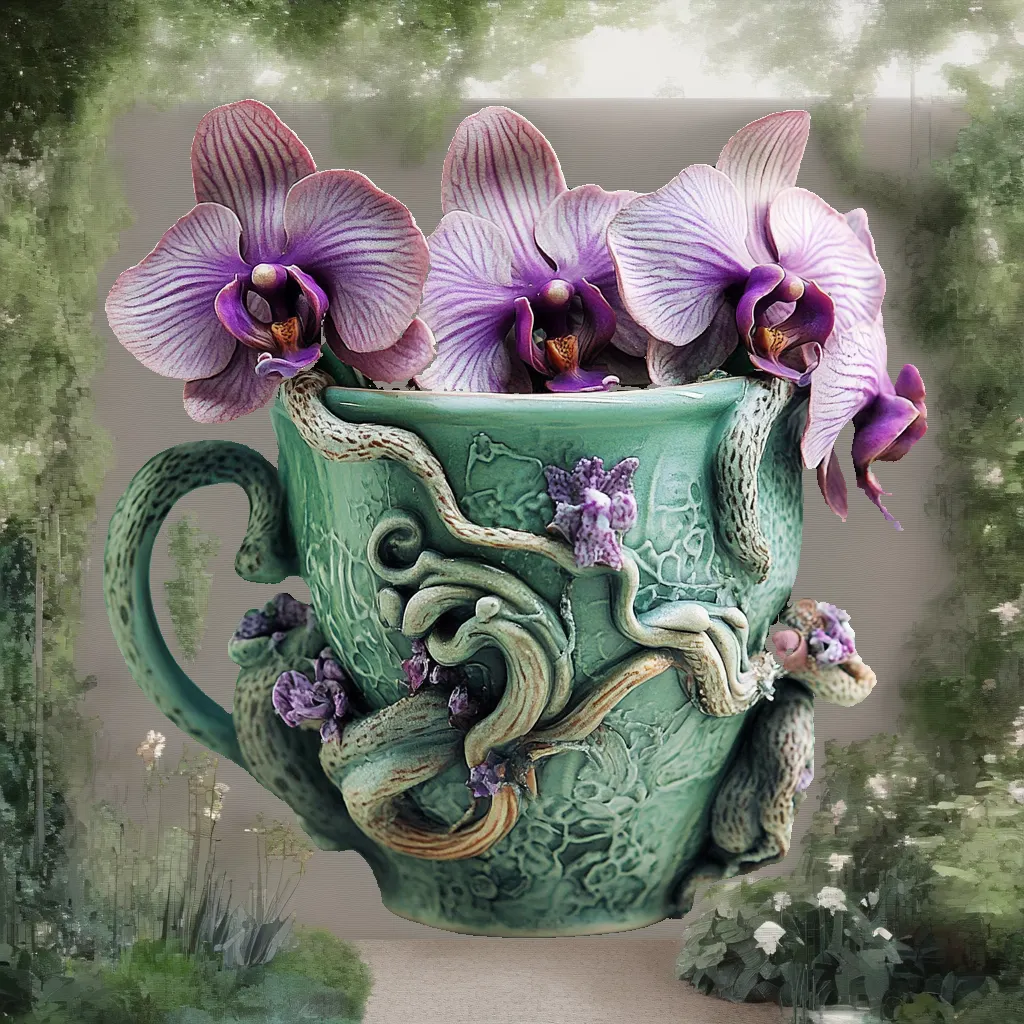
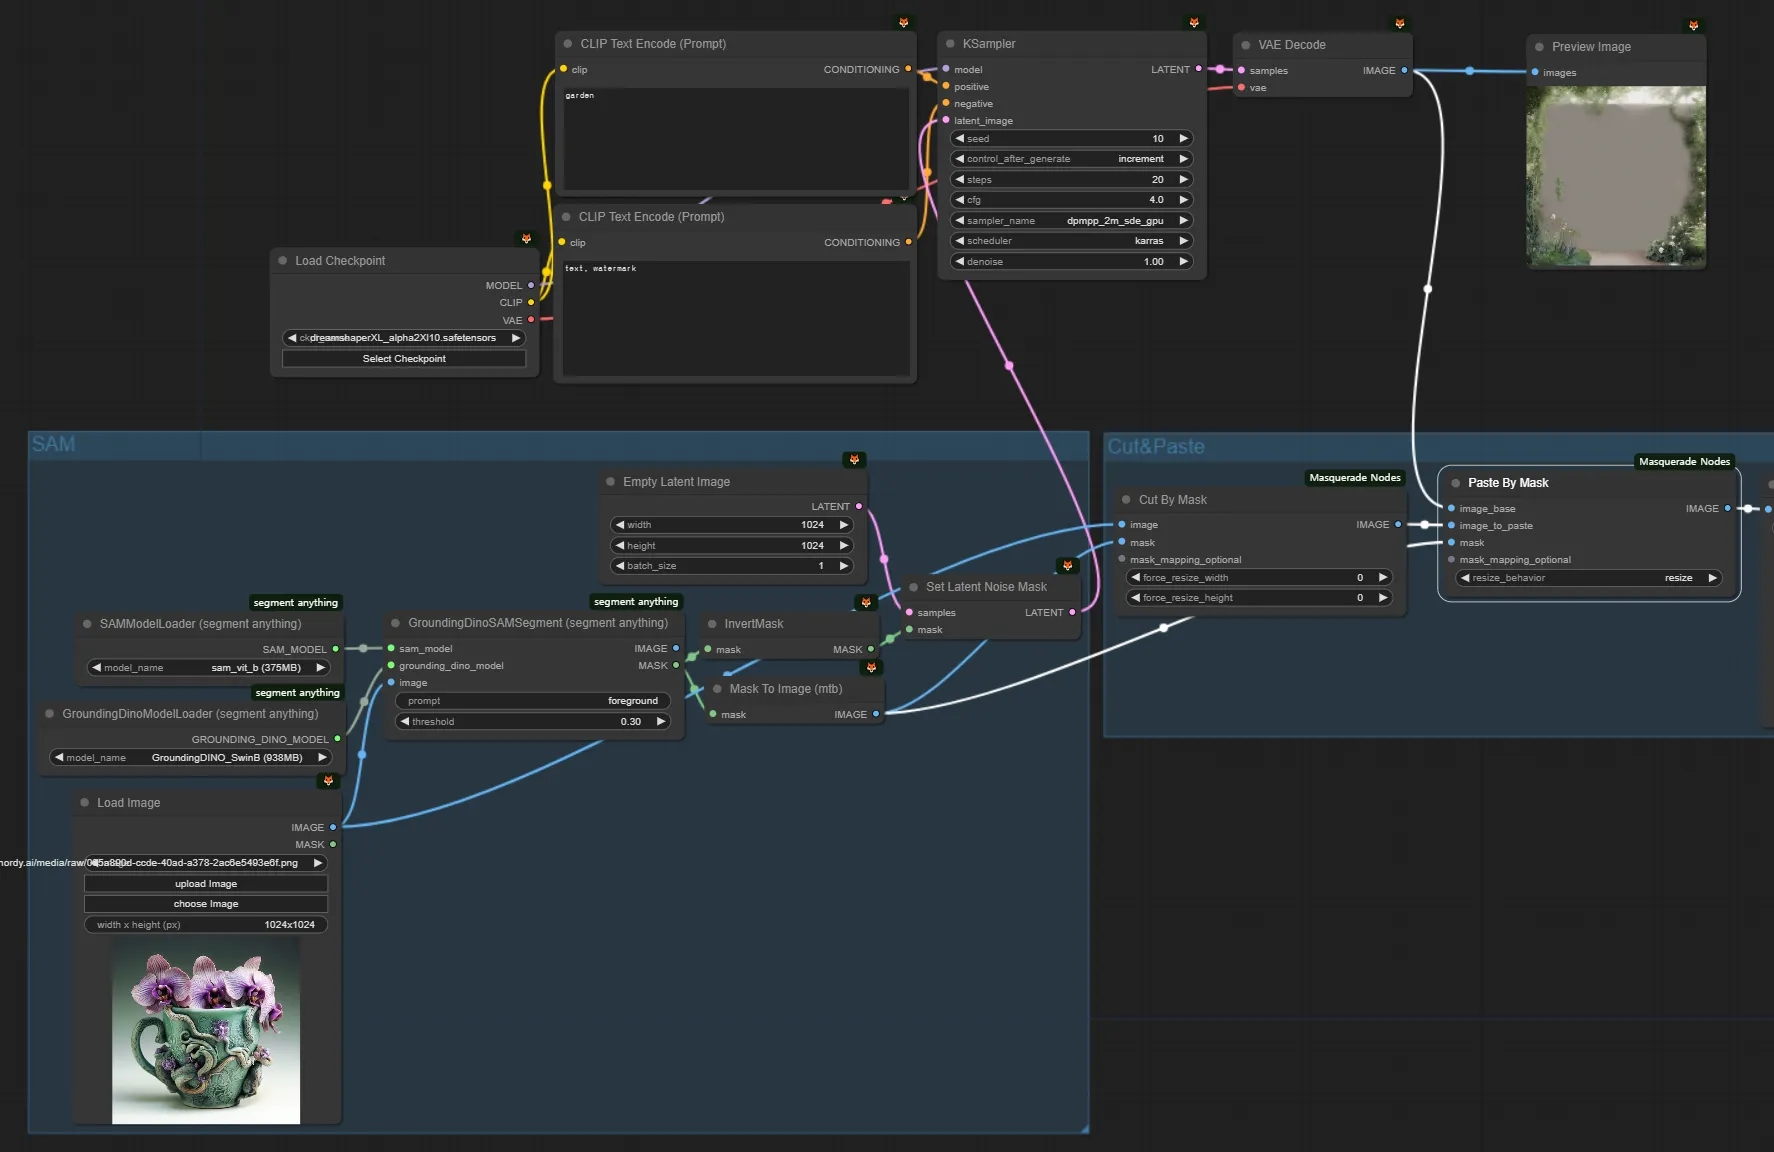
Having created a mask for the pot using the mask techniques learned earlier, let's proceed to regenerate the background while excluding the pot area.
Literally, since we are saying 'excluding the pot area,' we invert the previously created mask. This designates the opposite area.
Then, use Set Latent Noise to input it as a Latent Image. This means that we will use this area as the Latent.
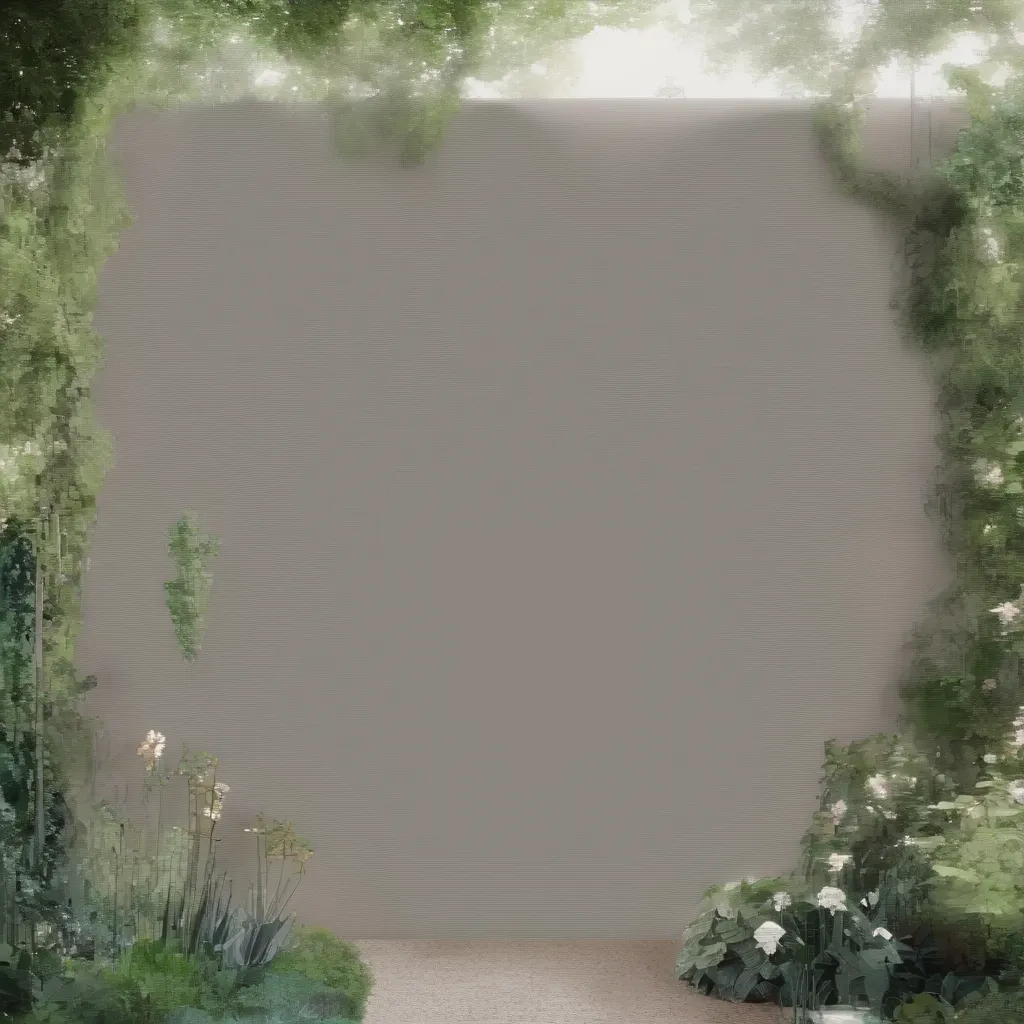
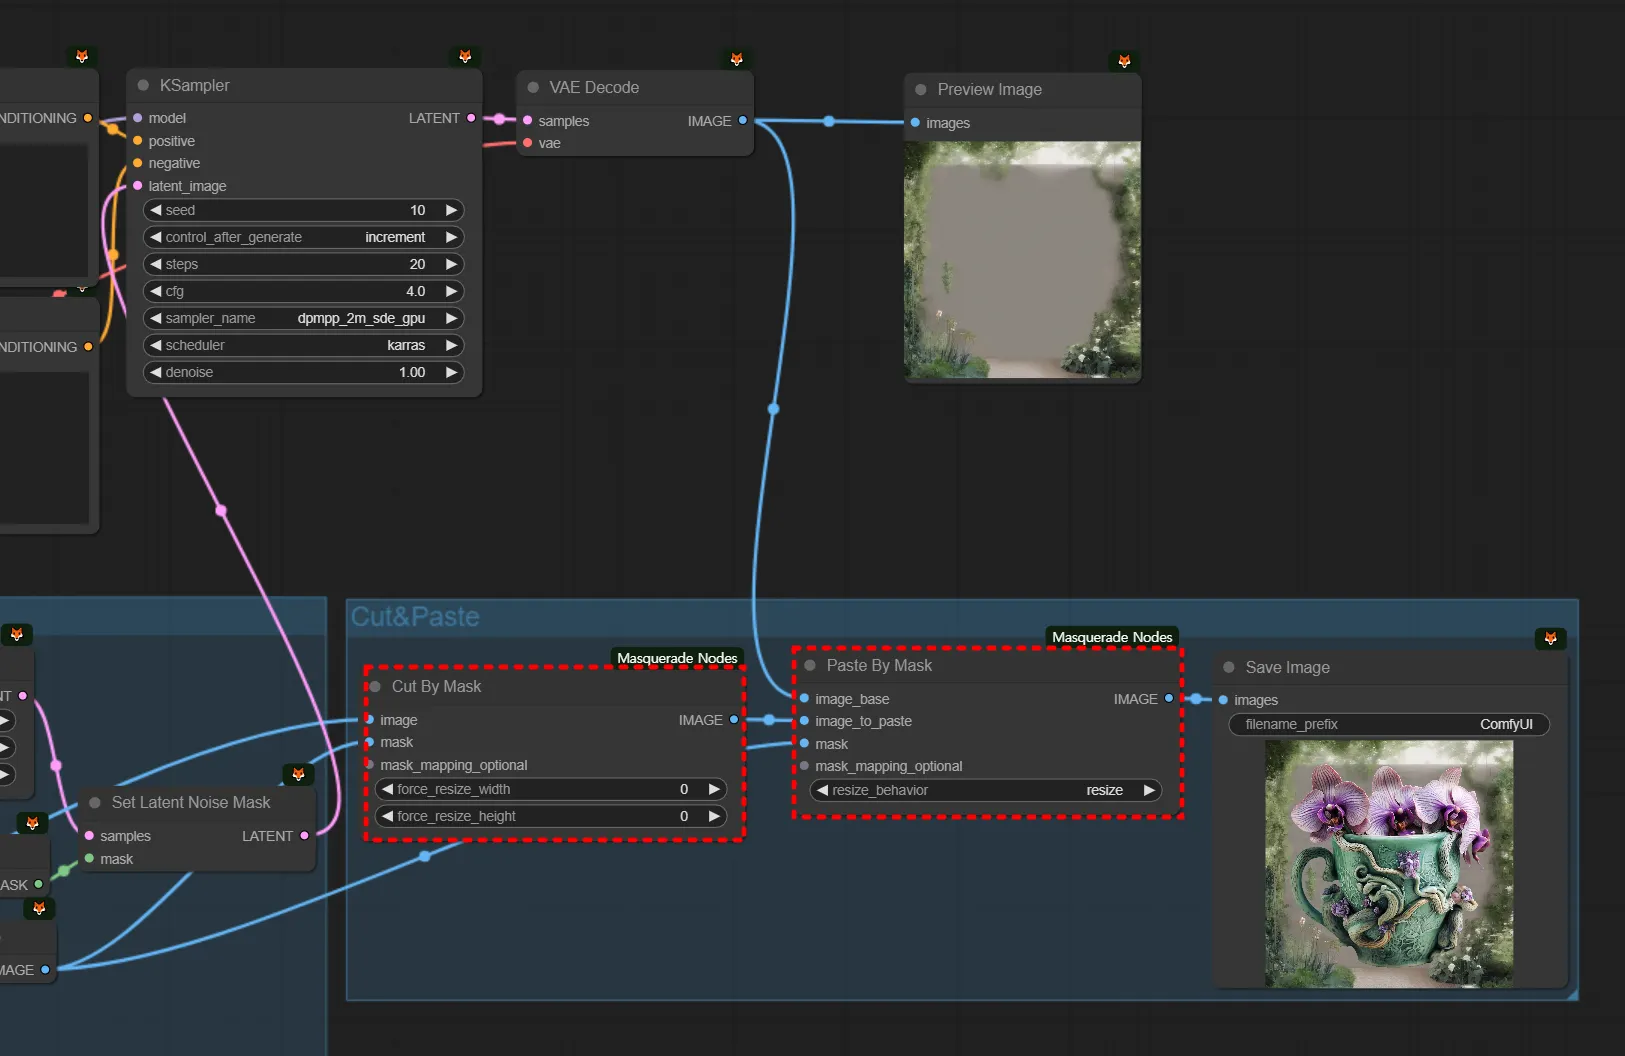
After generating the image in this way, you need to use cut and paste to place it appropriately, excluding the mask area.
Please note that since we are only learning the skills right now, the image quality may not be optimal. This will be addressed as we learn other skills later.
As you work through the process of connecting things step by step, you'll improve your skills by figuring out what to connect where and how. Here’s a detailed explanation:
•
For cutting: Take the original image and use SAM to create the mask. Cut the image according to this mask.
•
For pasting: Use the generated image and paste the cut-out image onto it according to the SAM mask you created earlier.
In summary, this is a basic overview of what masks are and how they work. You can consider this an introductory understanding, and you’ll delve into more details about masks in Chapter 6.

