Learning Goals
Let's learn more about masks that are useful for adjusting 'parts' of an image.
First, review a case study in section 6.3.1. From section 6.3.2 onward, explanations will cover specific technical details.
As I’ve mentioned repeatedly, don't worry if there’s a lot of information; you don’t need to read everything thoroughly—just refer to what you need.
Plain Text
복사
6.3.1. Masking
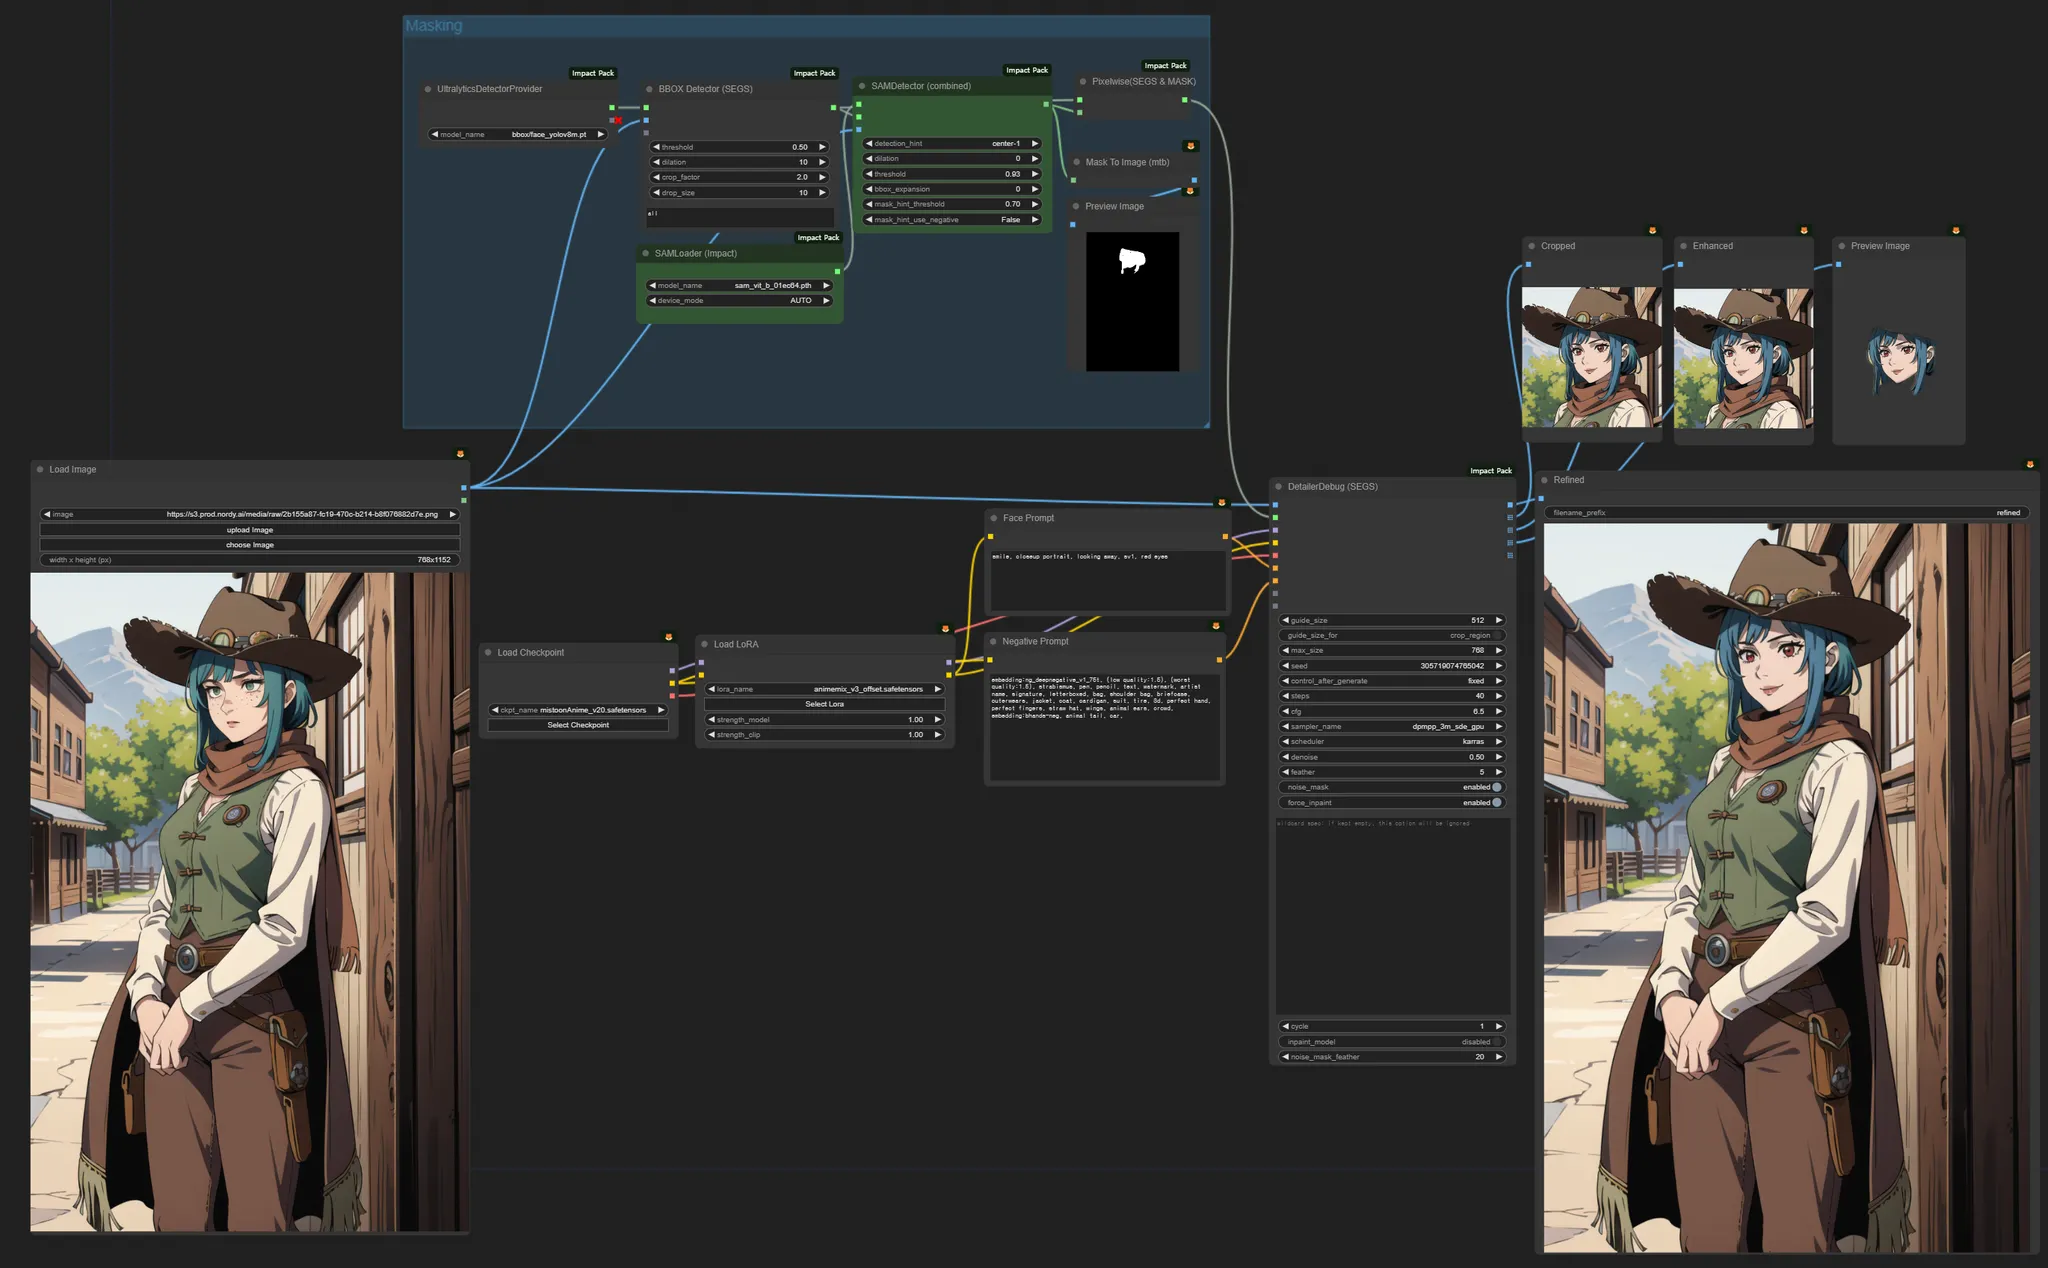
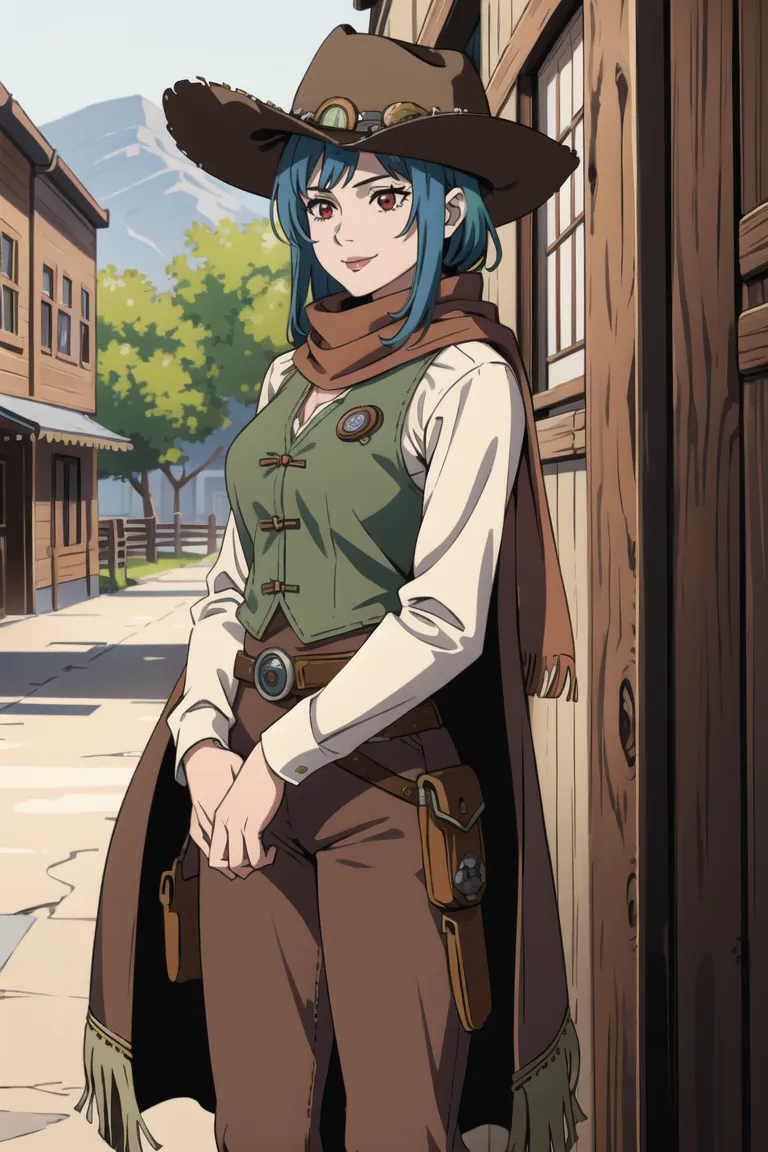
By using masking, you can modify and generate only the facial part of an already created character.
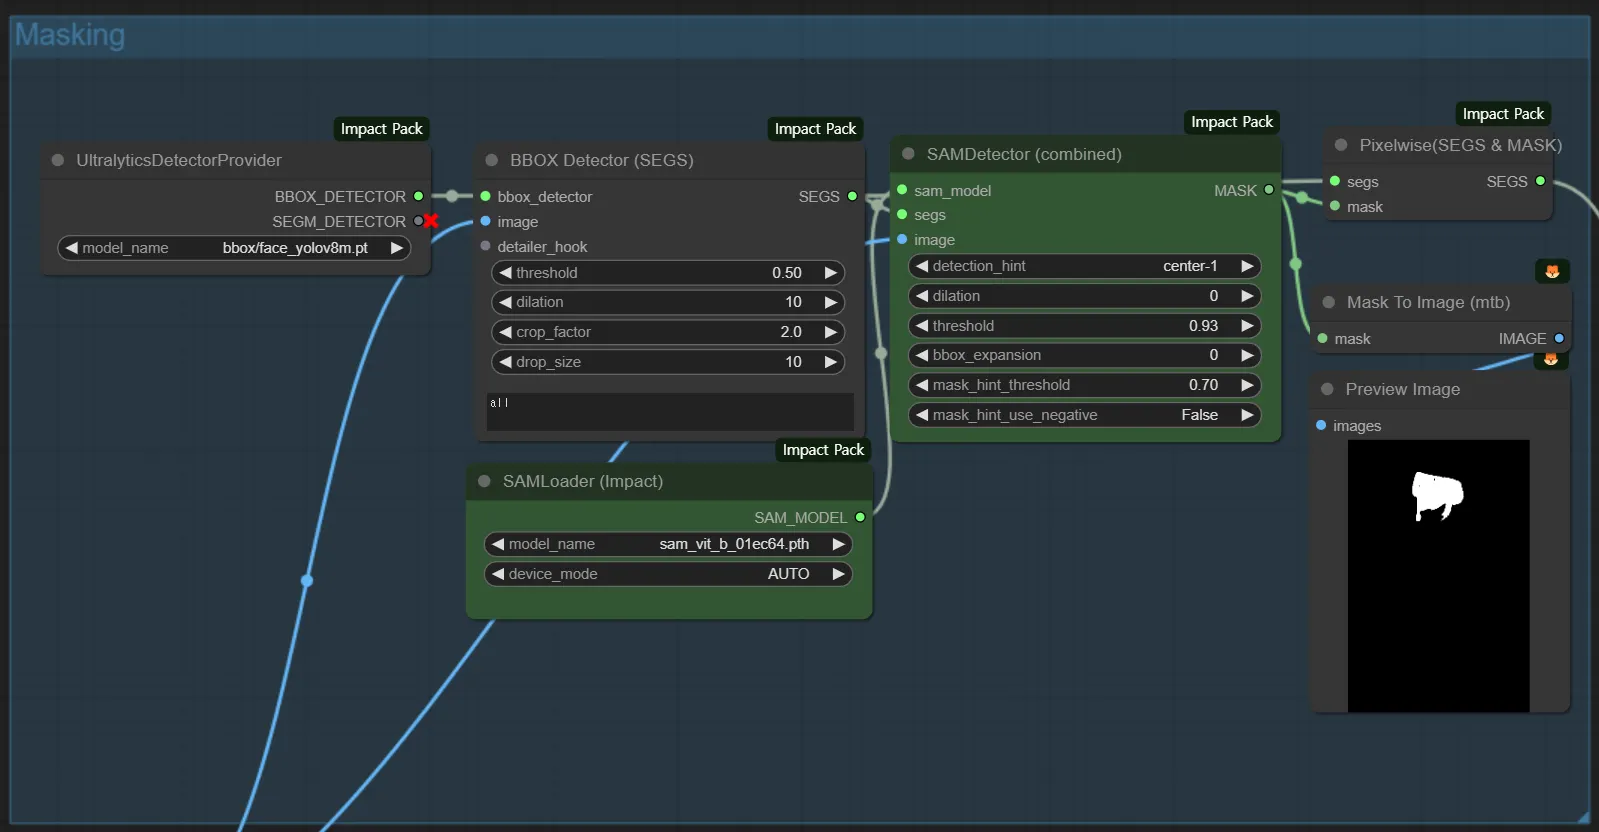
Use the BBOX Detector and SAM Detector to mask only the facial part with maximum detail.
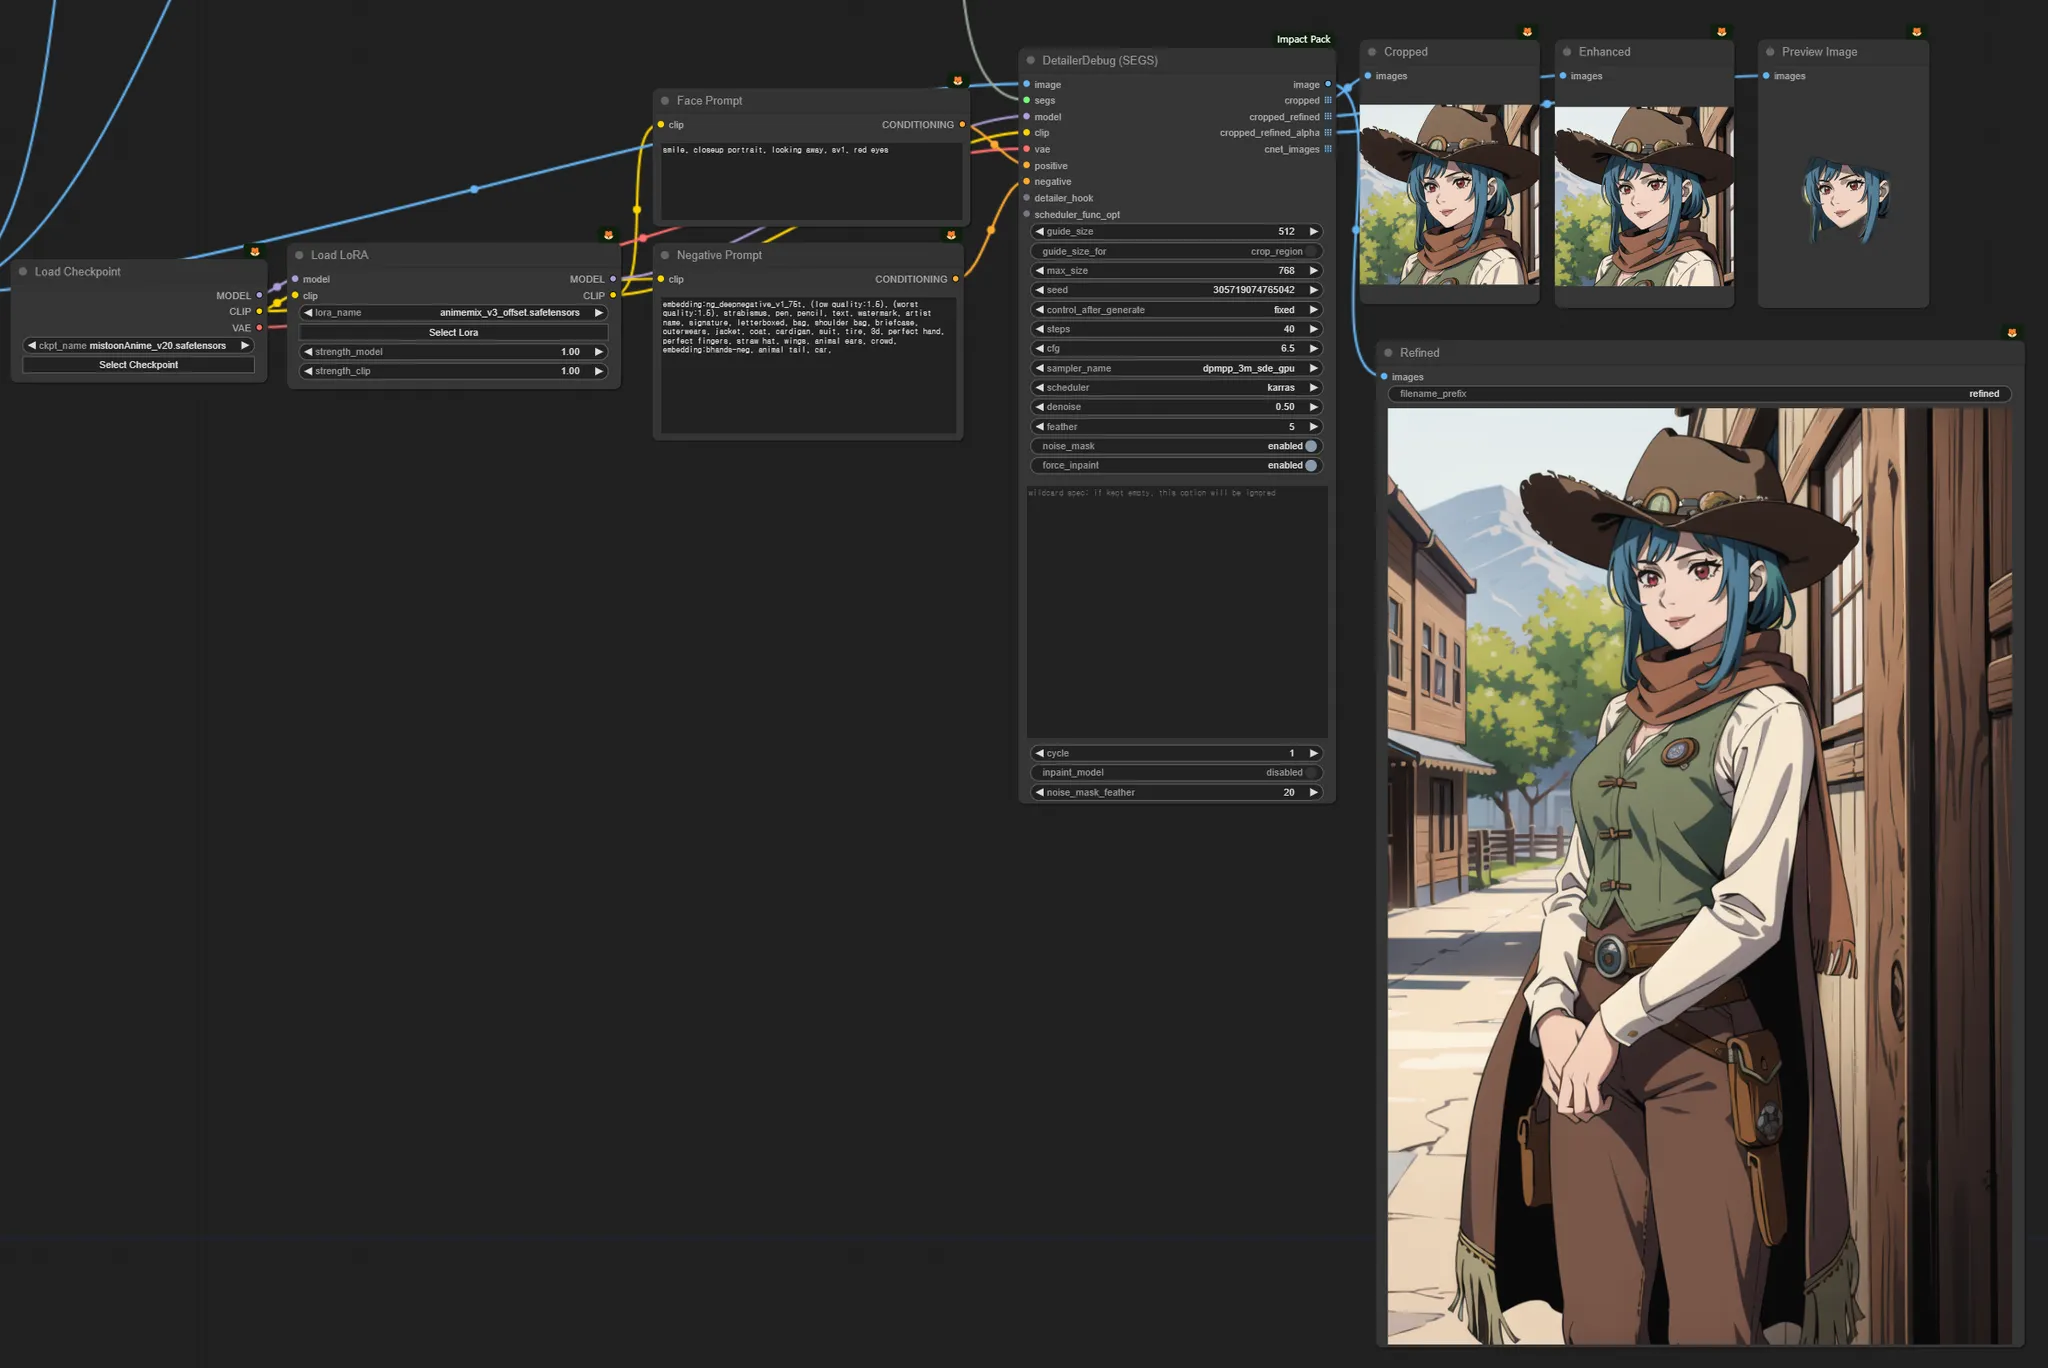
Only the masked facial part is recognized, allowing modifications to that area according to the prompt while keeping the other parts unchanged.
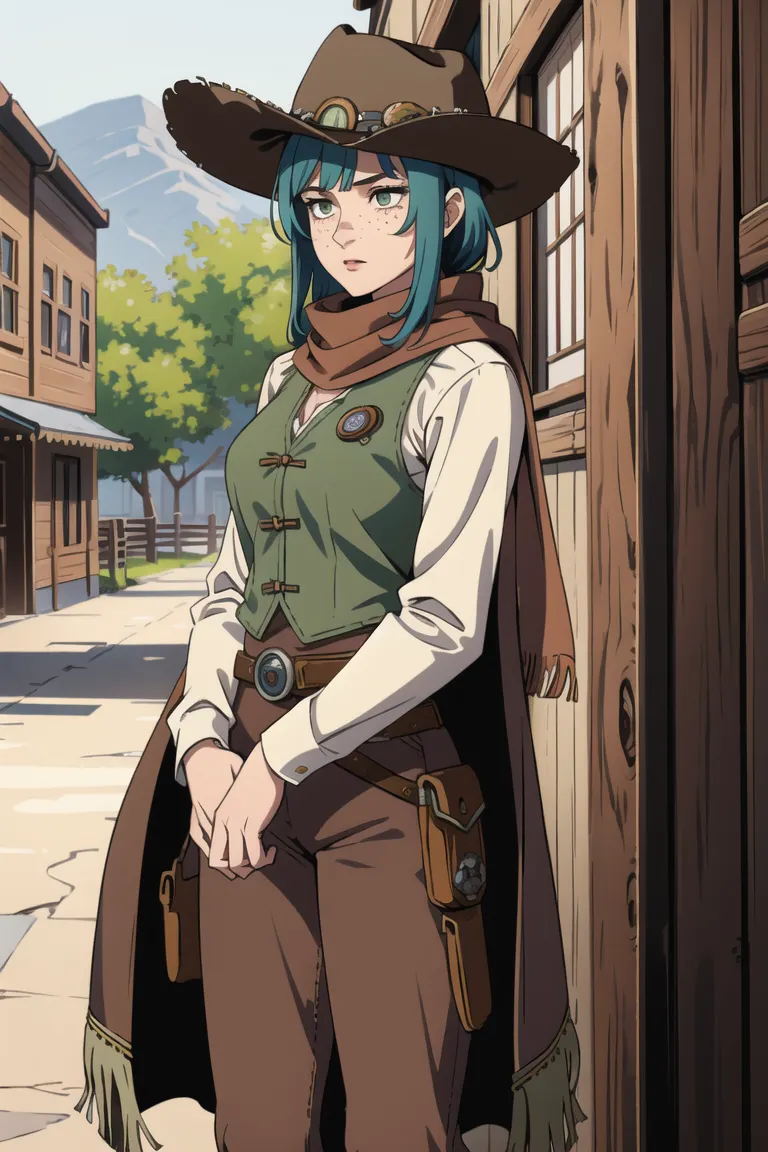
Before
After
When comparing the generated images, you can see that the rest of the image remains the same while only the facial expression and eye color have changed.
1. Basic Concept of Masking
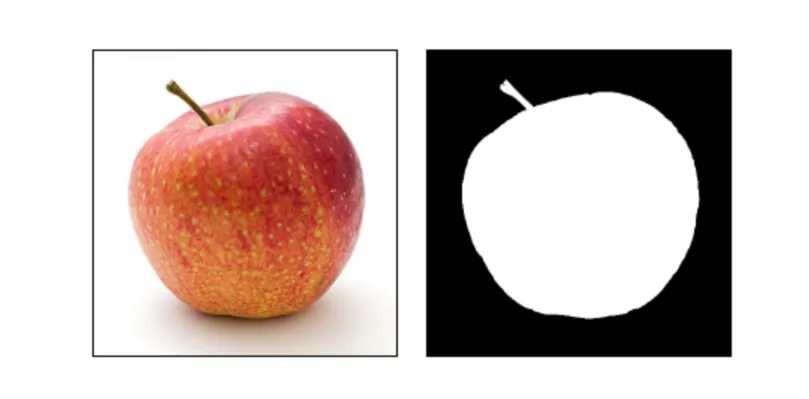
Masking is a technique for selecting or excluding specific parts of an image. Similar to a black-and-white image, each pixel has a value that indicates whether it is selected or not, with white (255) typically representing the selected area and black (0) representing the unselected area.
2. Mask Creation Methods
6.3.2. SAM
SAM (Segment Anything Model)
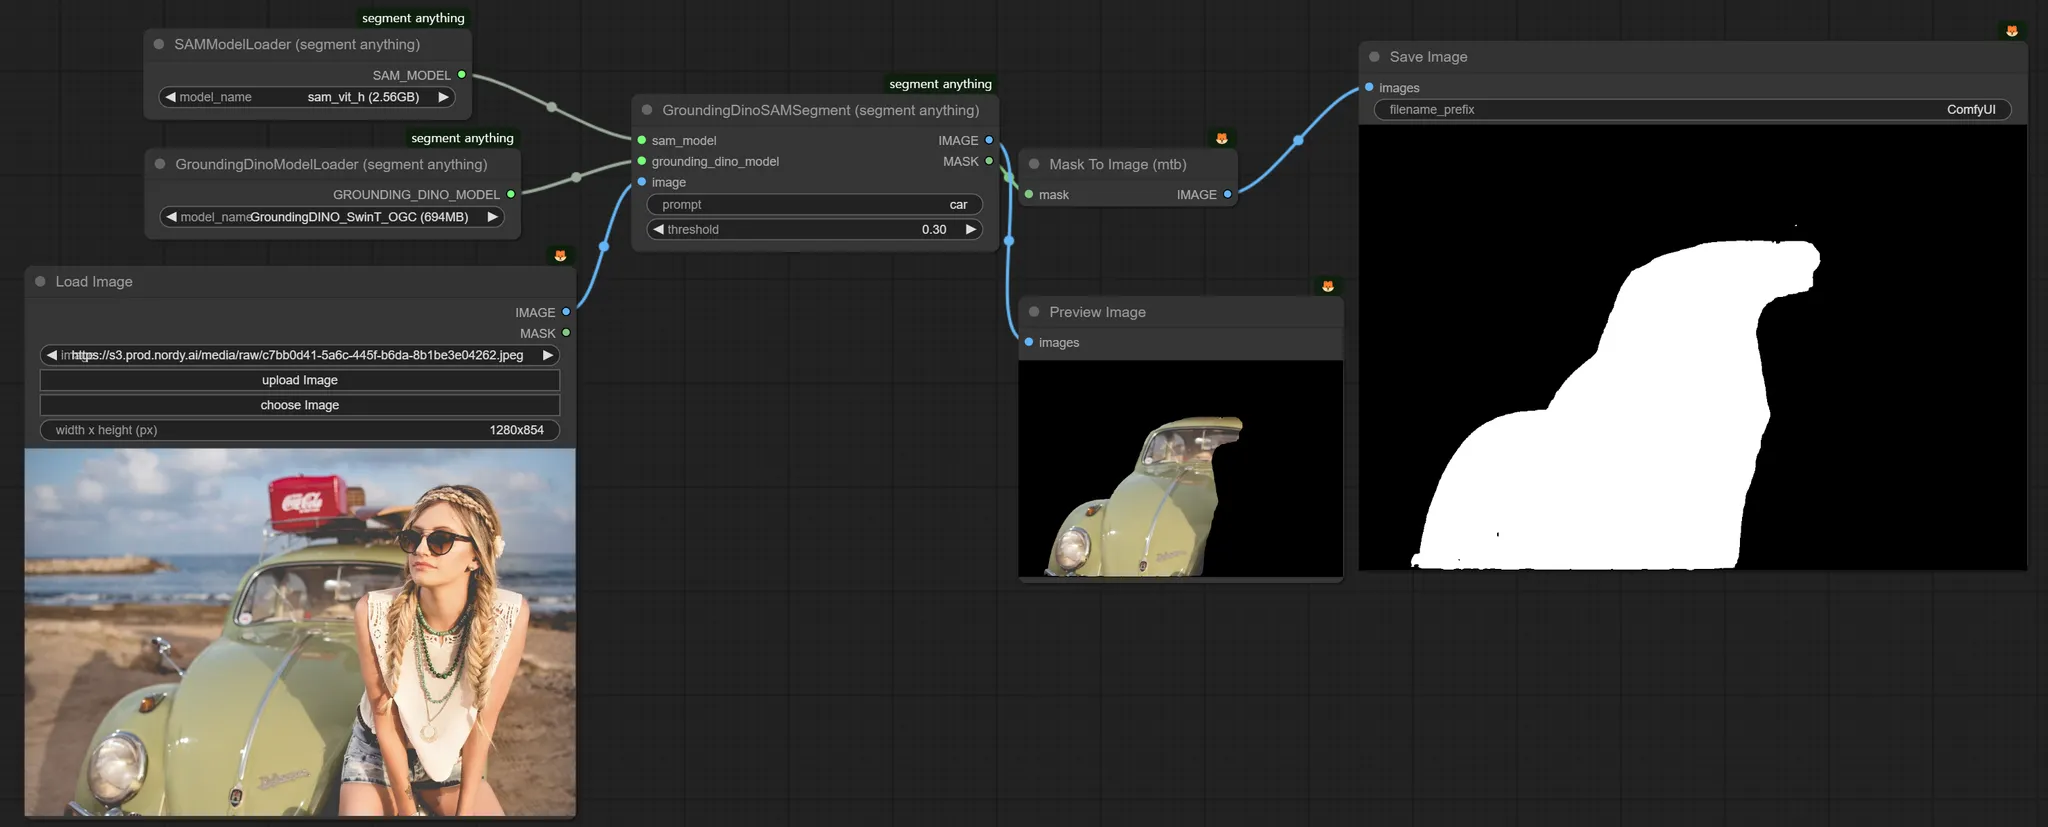
SAM is used to automatically segment objects within an image. It is effective for distinguishing between backgrounds and objects, but may have limitations for more detailed tasks.
6.3.3. RMBG
RMBG is a model designed to remove backgrounds cleanly.
For simpler images, this model can provide more detailed masks compared to SAM.
6.3.4. Mediapipe
Mediapipe (SEGS)
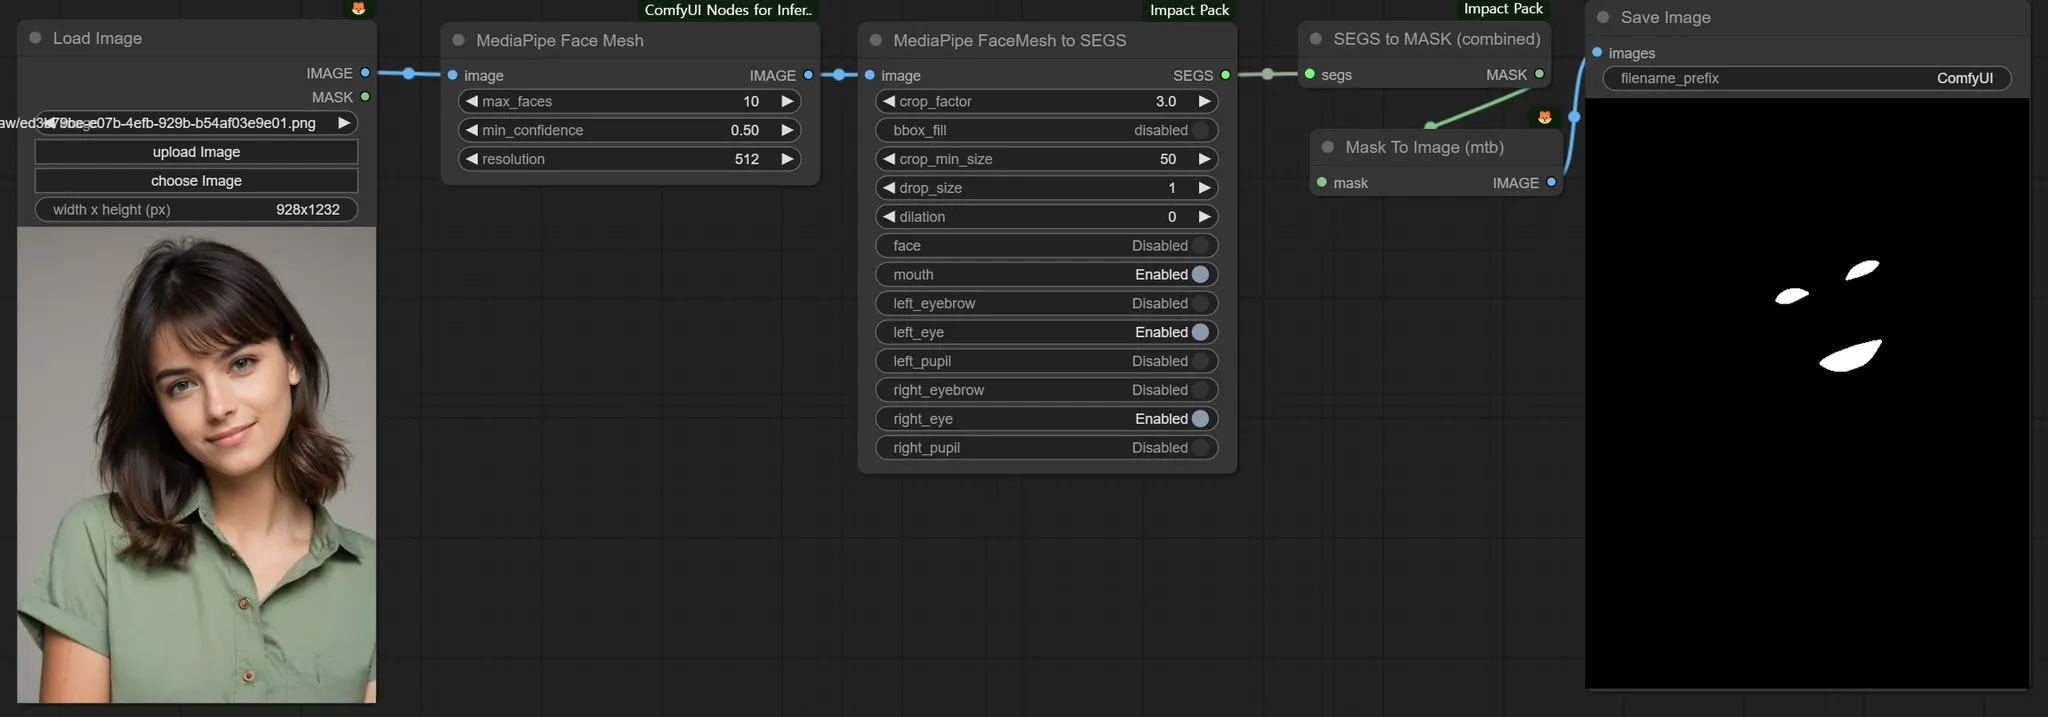
Mediapipe specializes in recognizing and segmenting specific facial features such as eyebrows and eyes.
Direct Mask Creation
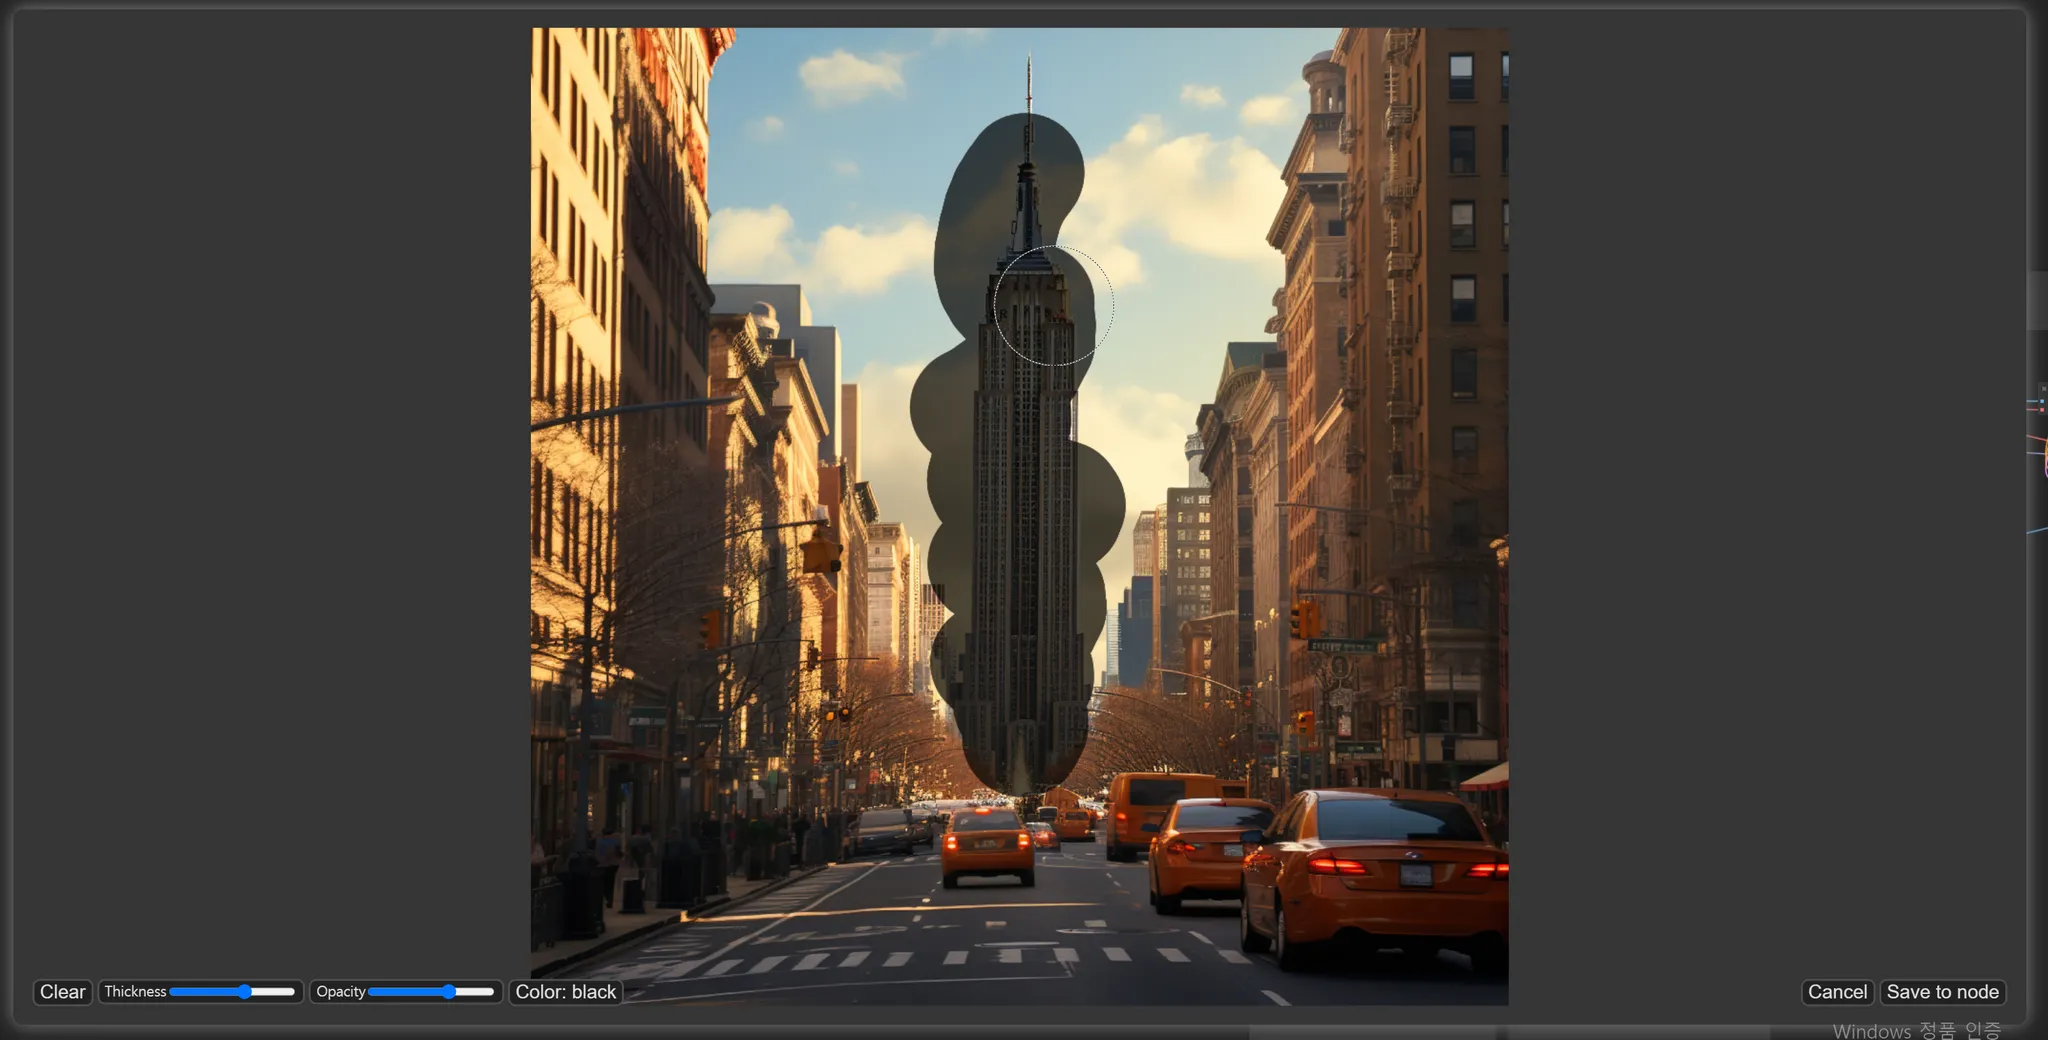
You can draw or create masks directly within the software. This method is useful when precise adjustments are needed.
Importing Masks from External Tools
You can import and use masks created in external graphic tools such as Photoshop, Illustrator, and Figma.
3. Mask Manipulation Techniques
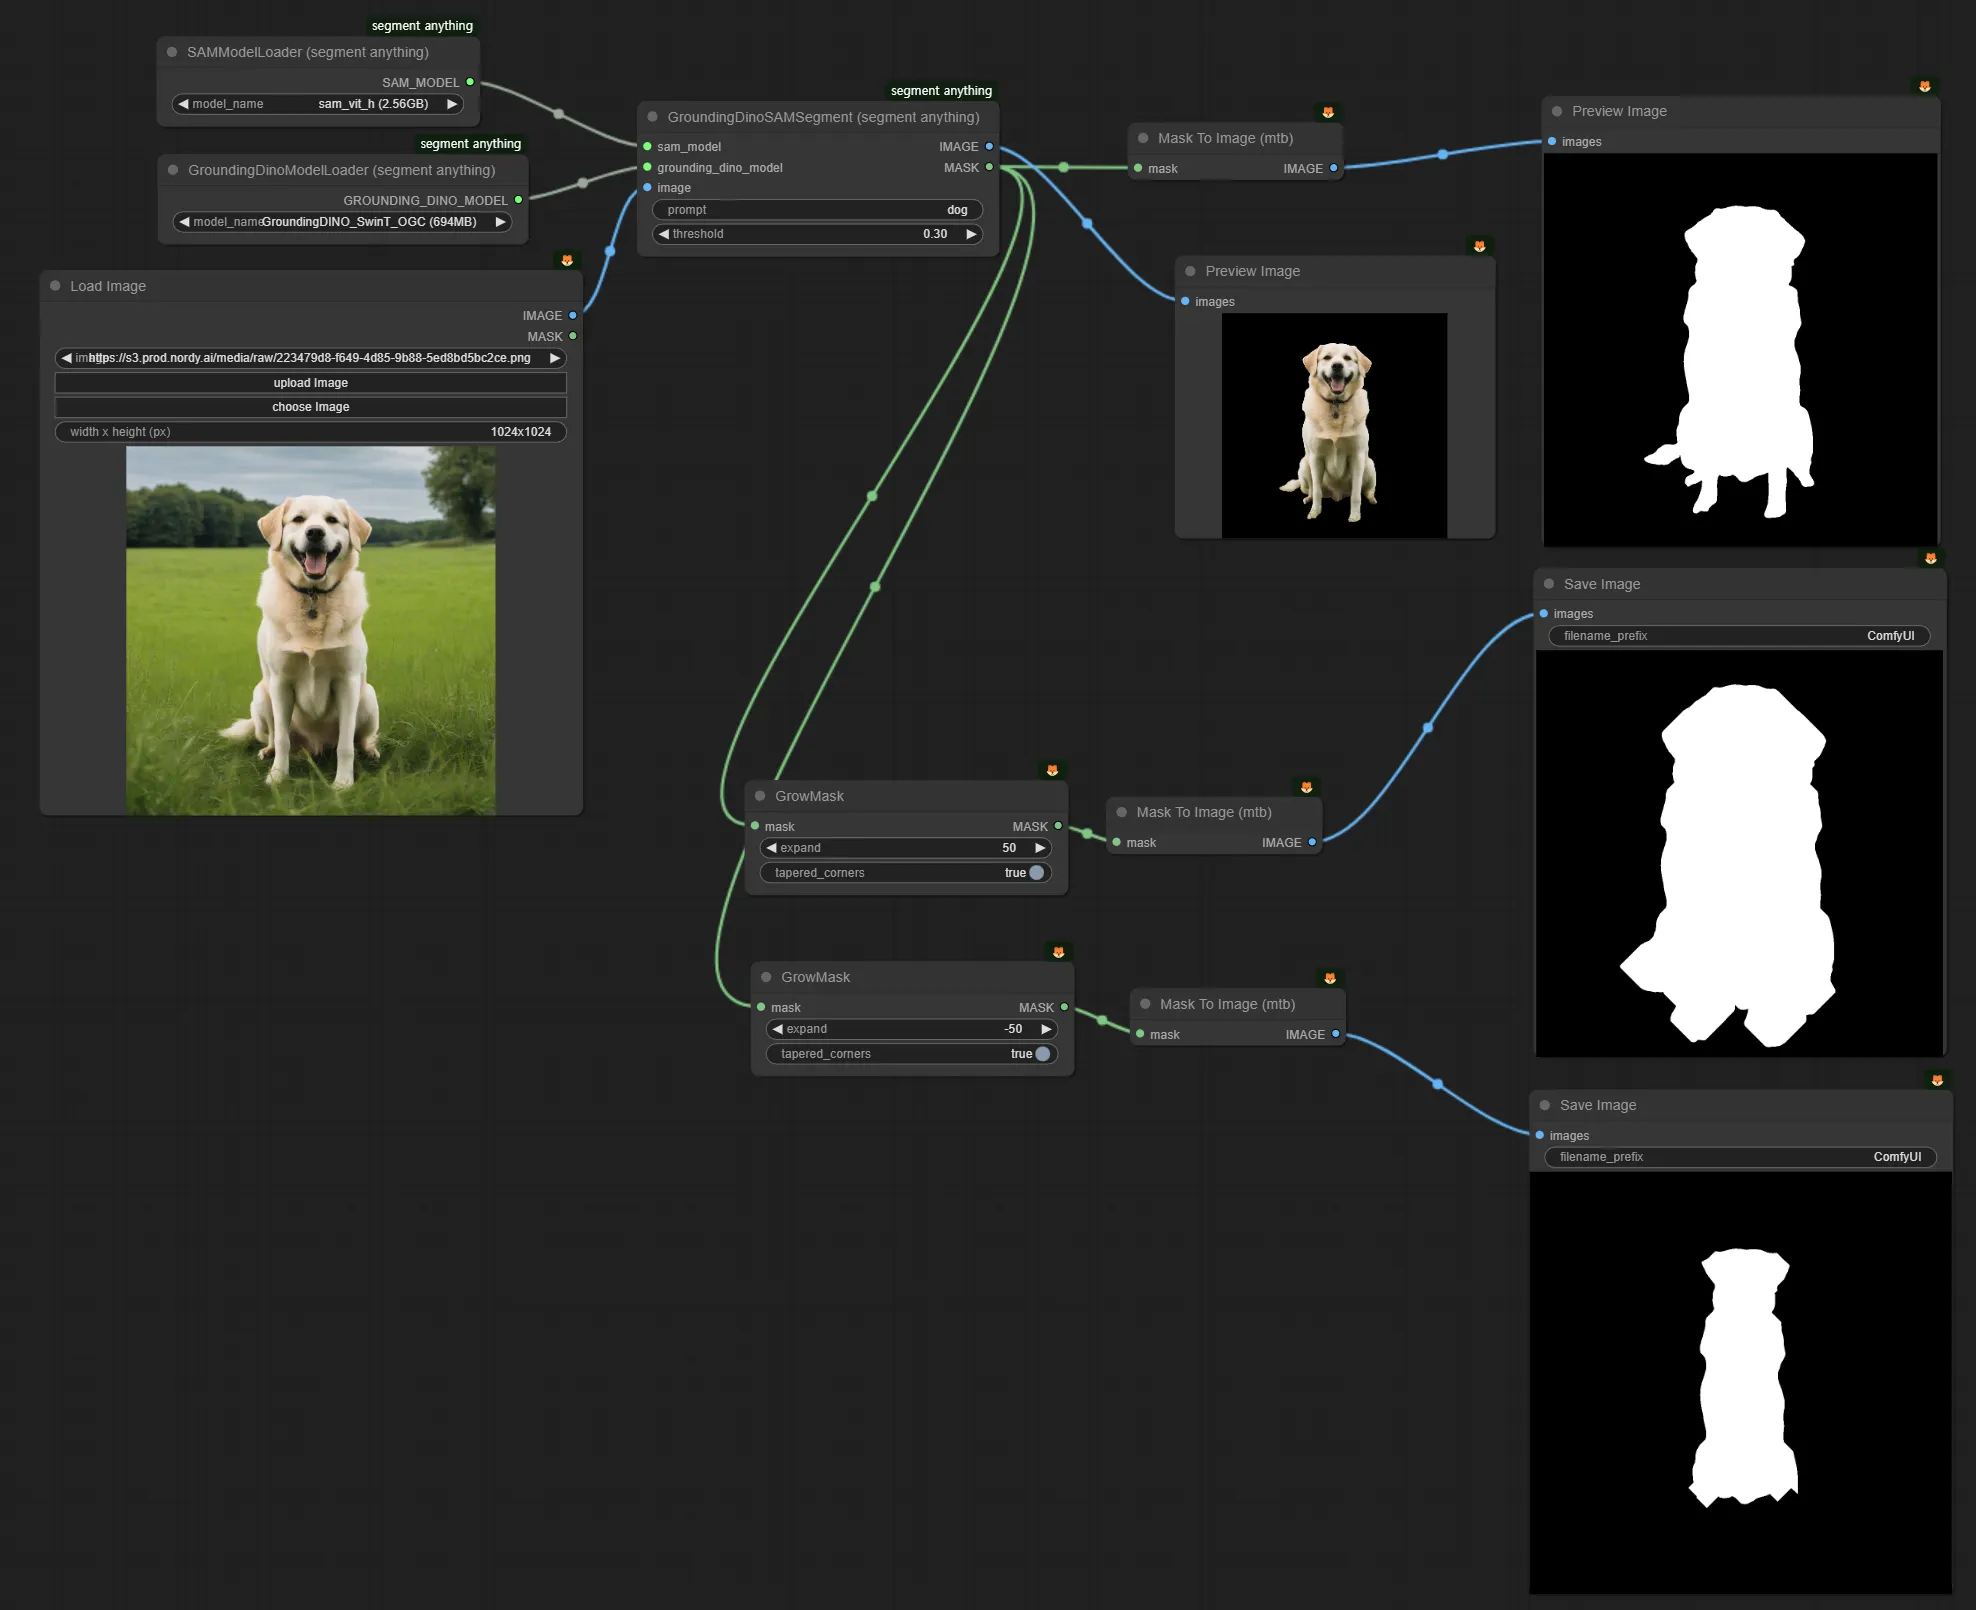
6.3.5. GrowMask
Mask Expansion/Contraction (Grow Mask)
You can use the "Grow Mask" node with positive/negative values to expand or contract the mask.
(For those interested in further details, this technique is traditionally referred to as erode/dilate in computer vision and is a more practical improvement of that method.)
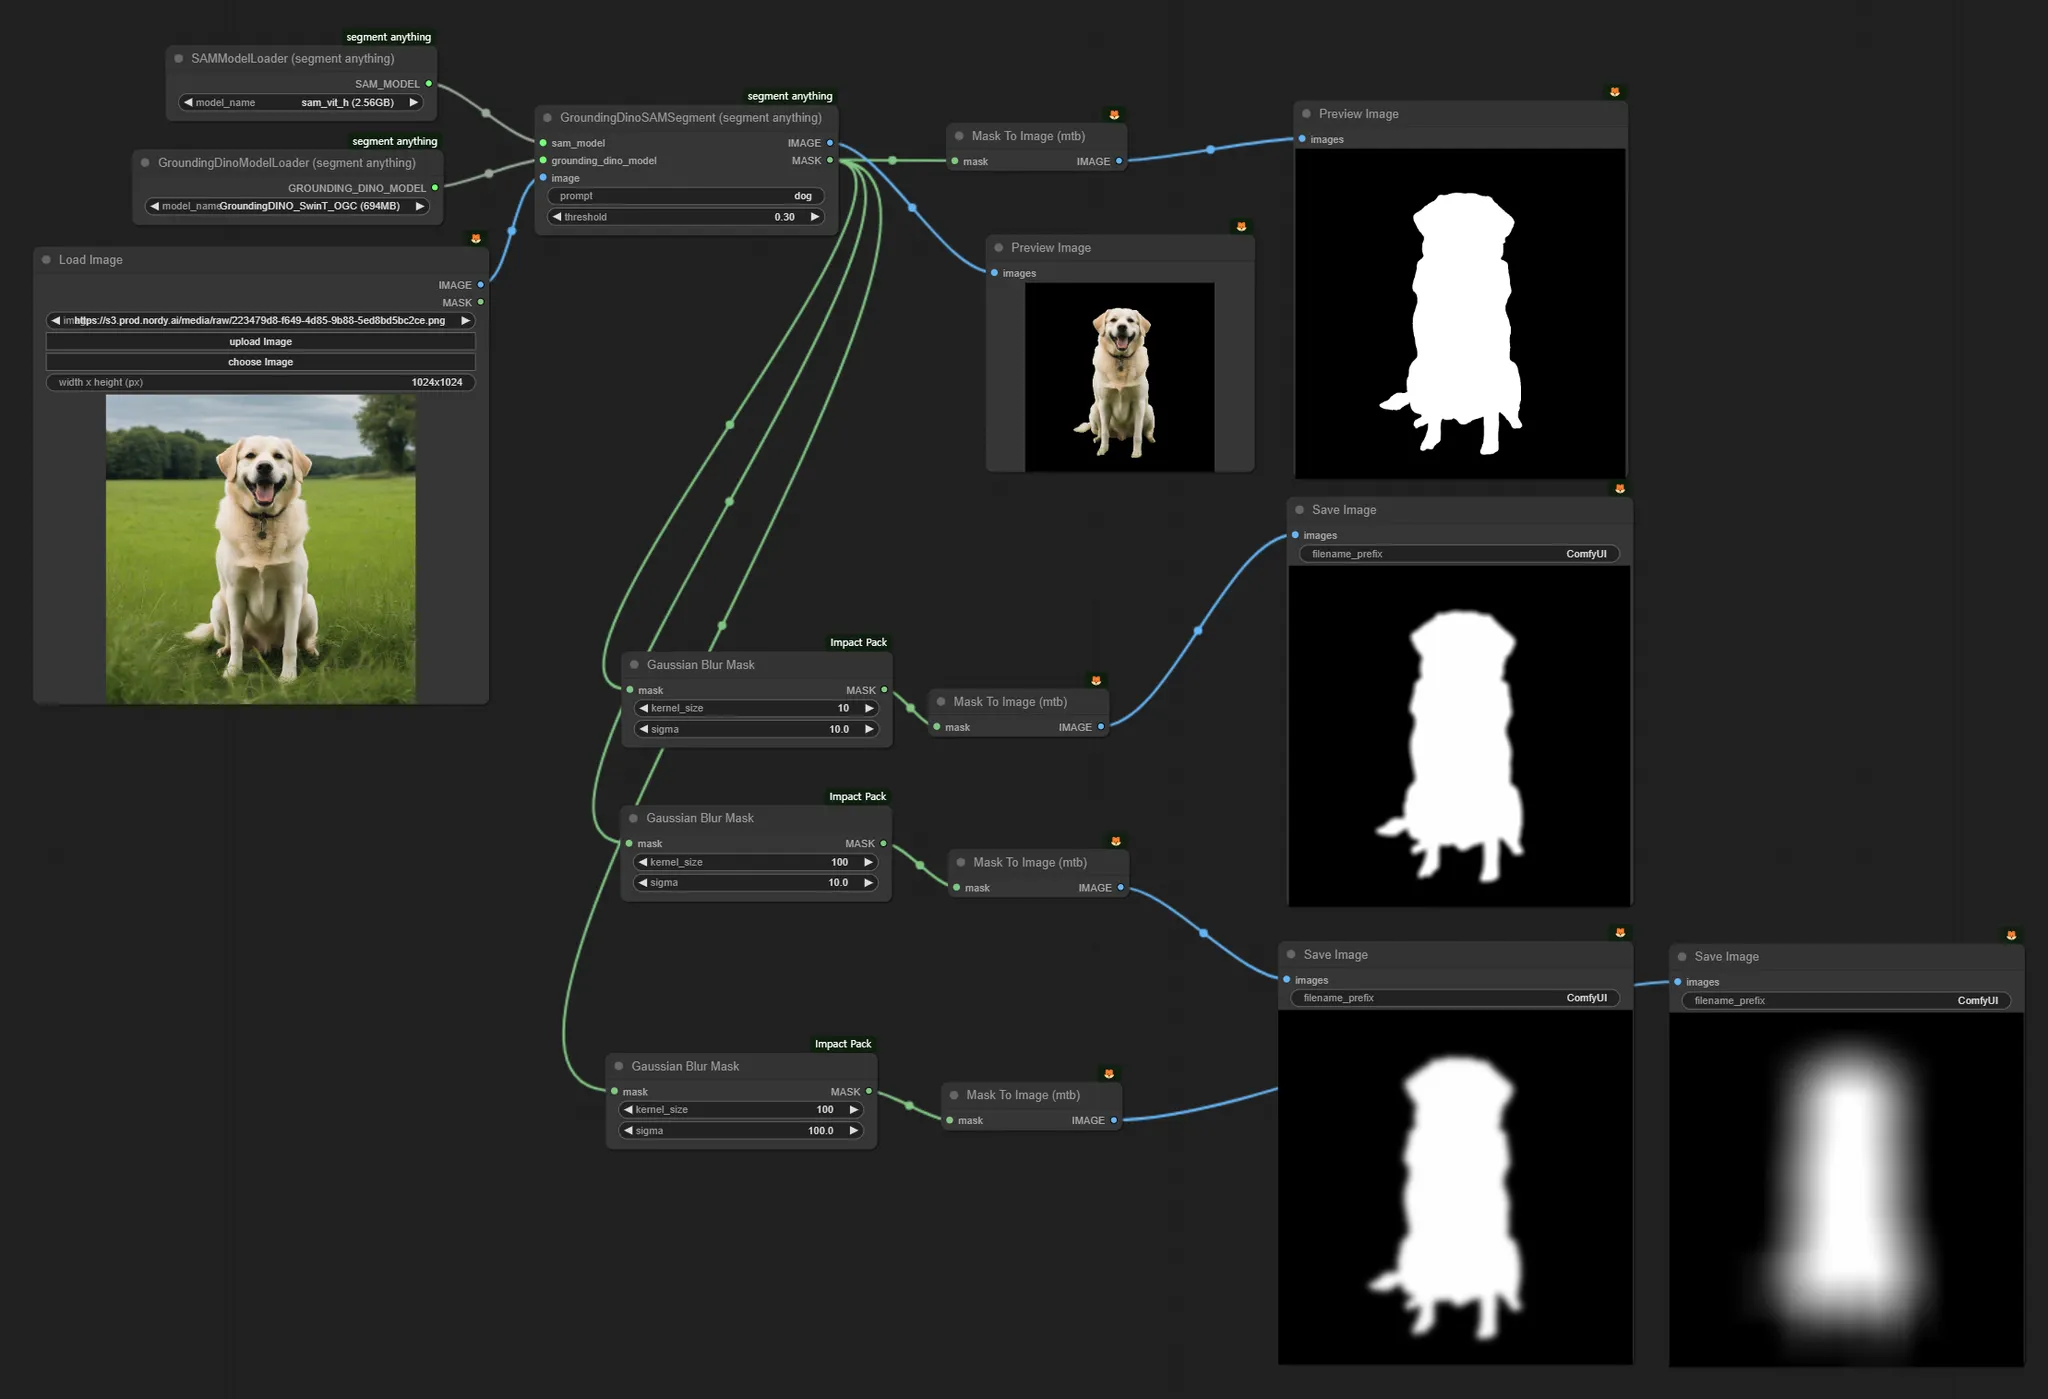
6.3.6. MaskBlur
Applies a blur effect to the edges of the mask to create smooth boundaries.
This helps in achieving a natural blending effect.
It can be used with the Gaussian Blur Mask node, where you can adjust the blur intensity by modifying the kernel size and sigma values.
6.3.7. Cut&Paste
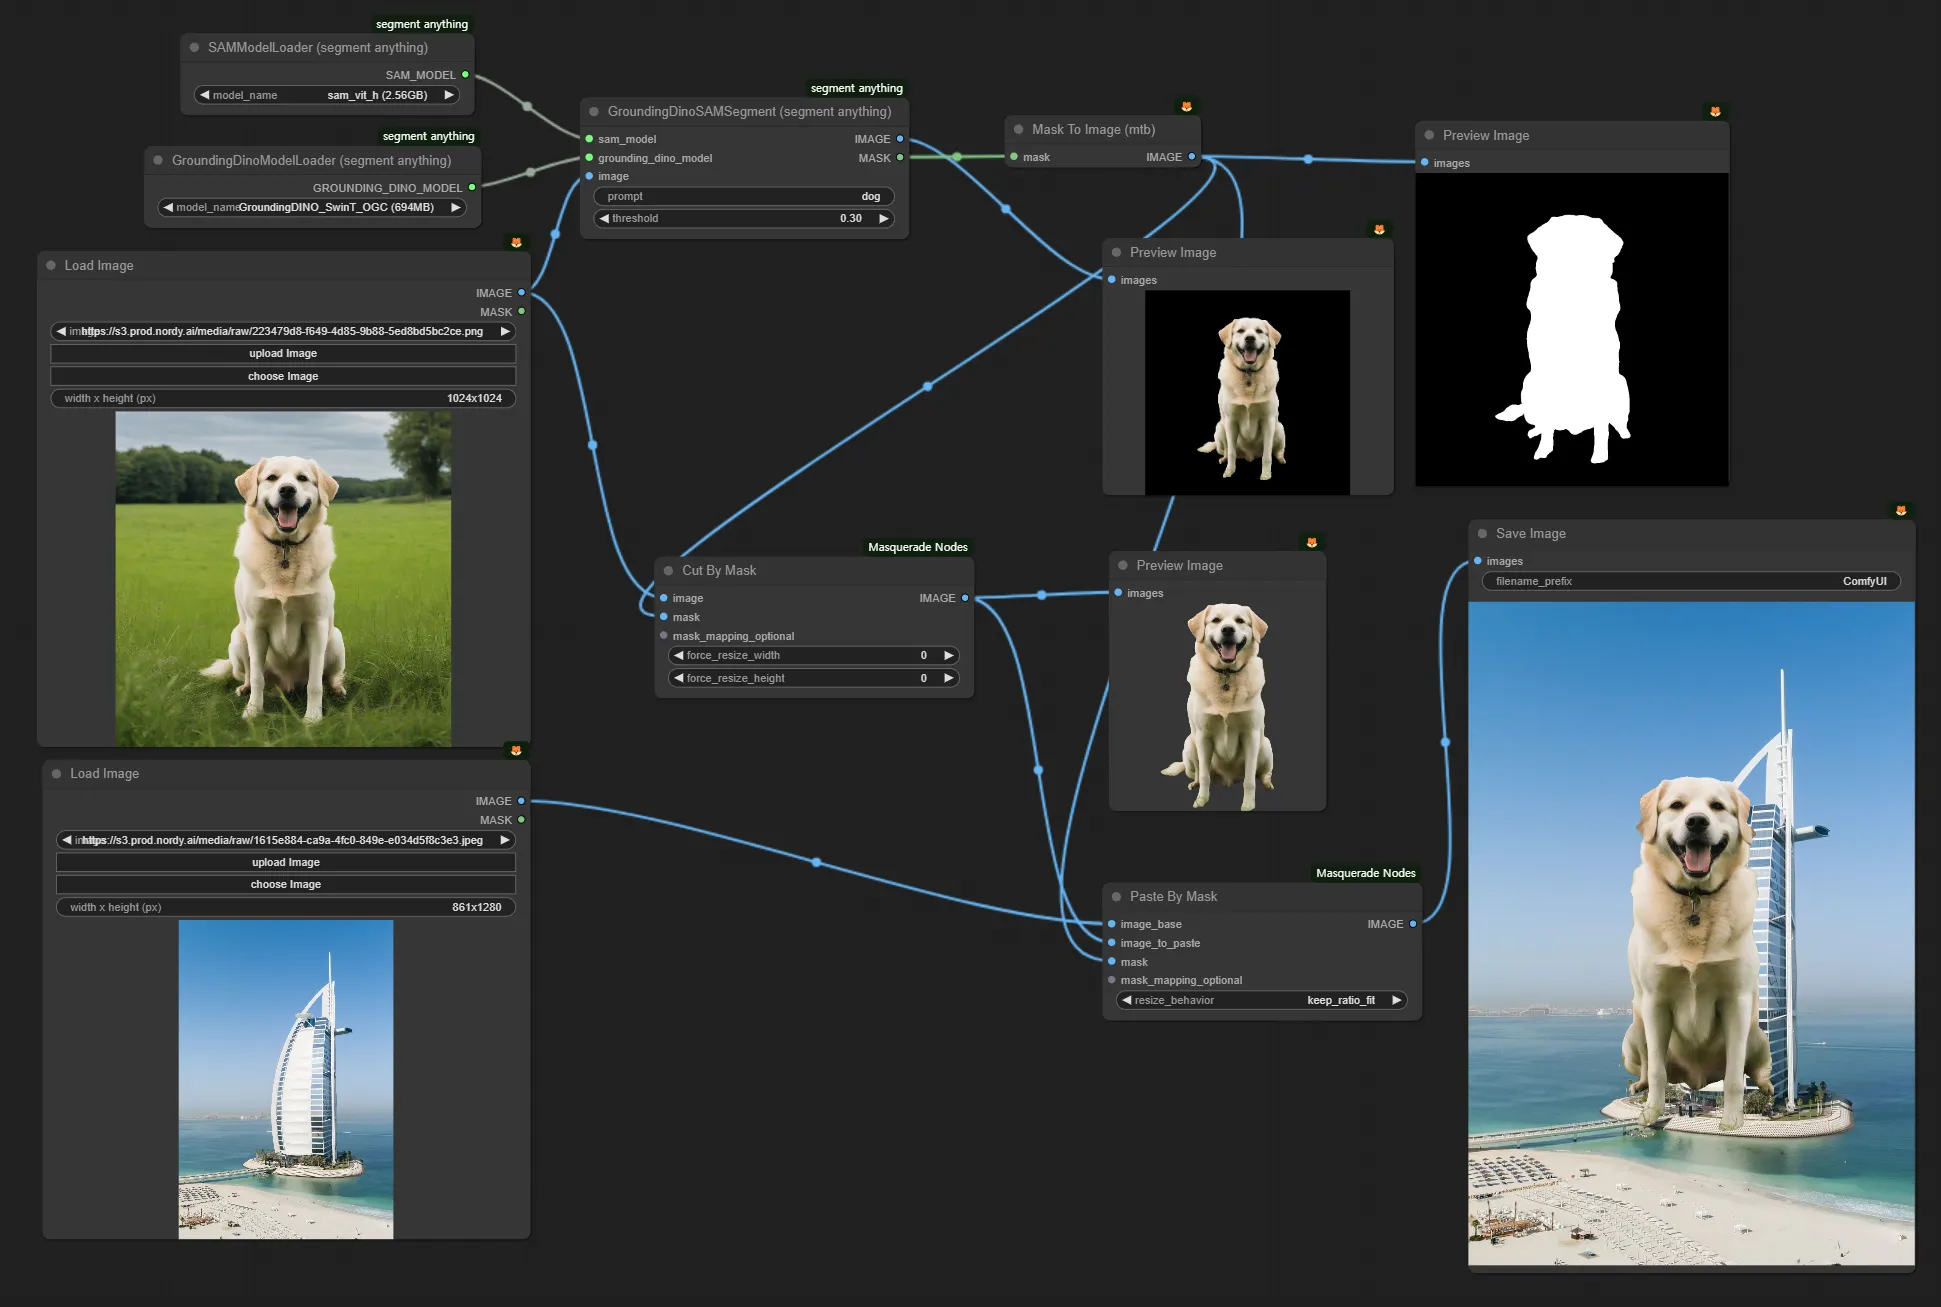
Masking Cut & Paste
Cuts a portion of an image according to the mask and pastes it onto another image.
Useful for creating or modifying complex images.
Use the Cut By Mask node to cut out the masked portion.
Use the Paste By Mask node to paste the cut-out portion. Adjust the resize_behavior value to modify the ratio or size.
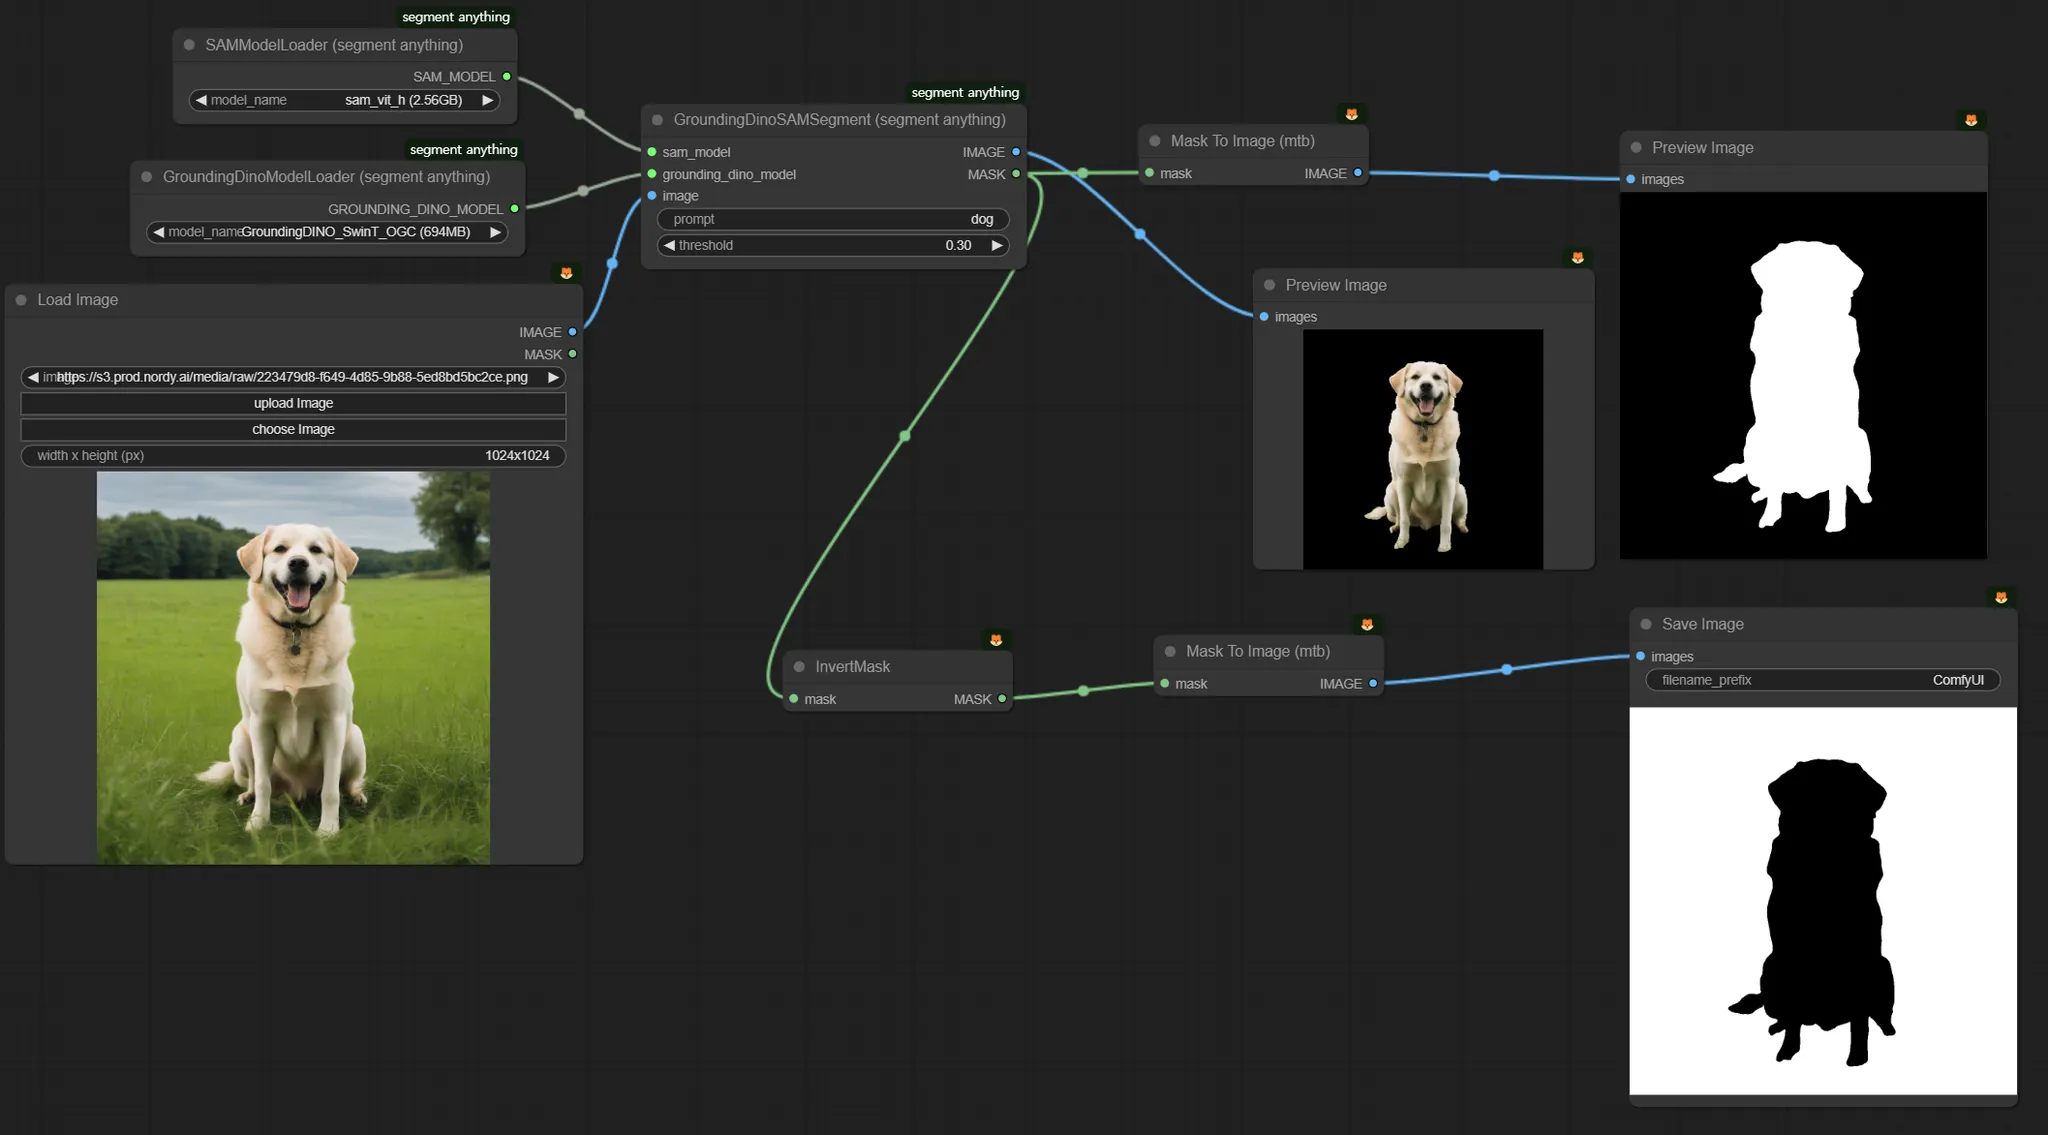
6.3.8. InvertMask
Inverting the mask swaps the selected and unselected areas.
Use the InvertMask node to invert the mask.
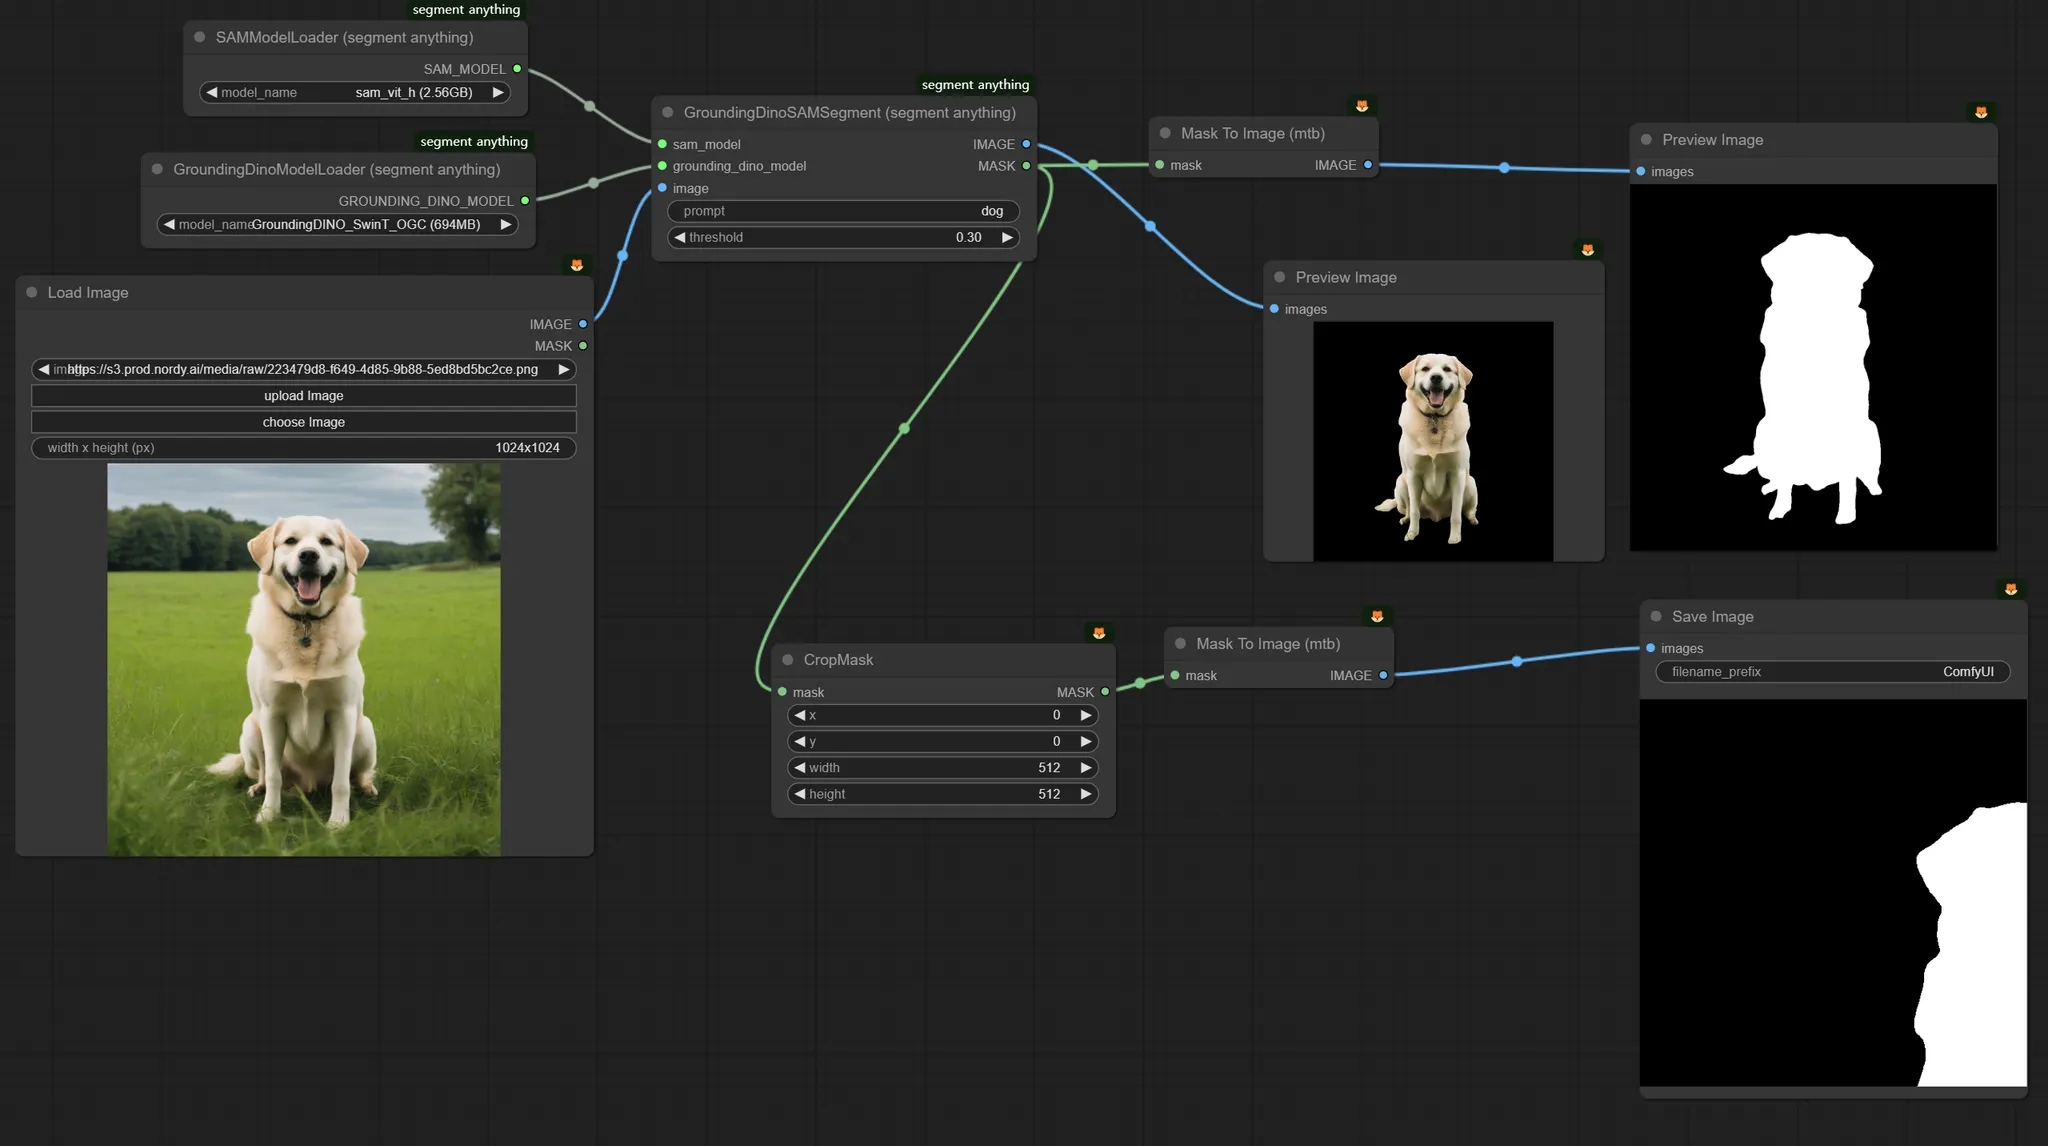
6.3.9. CropMask
Allows you to cut out and use specific parts of the mask.
This can be done with the CropMask node. Adjust the x, y, width, and height values to specify the area to crop.
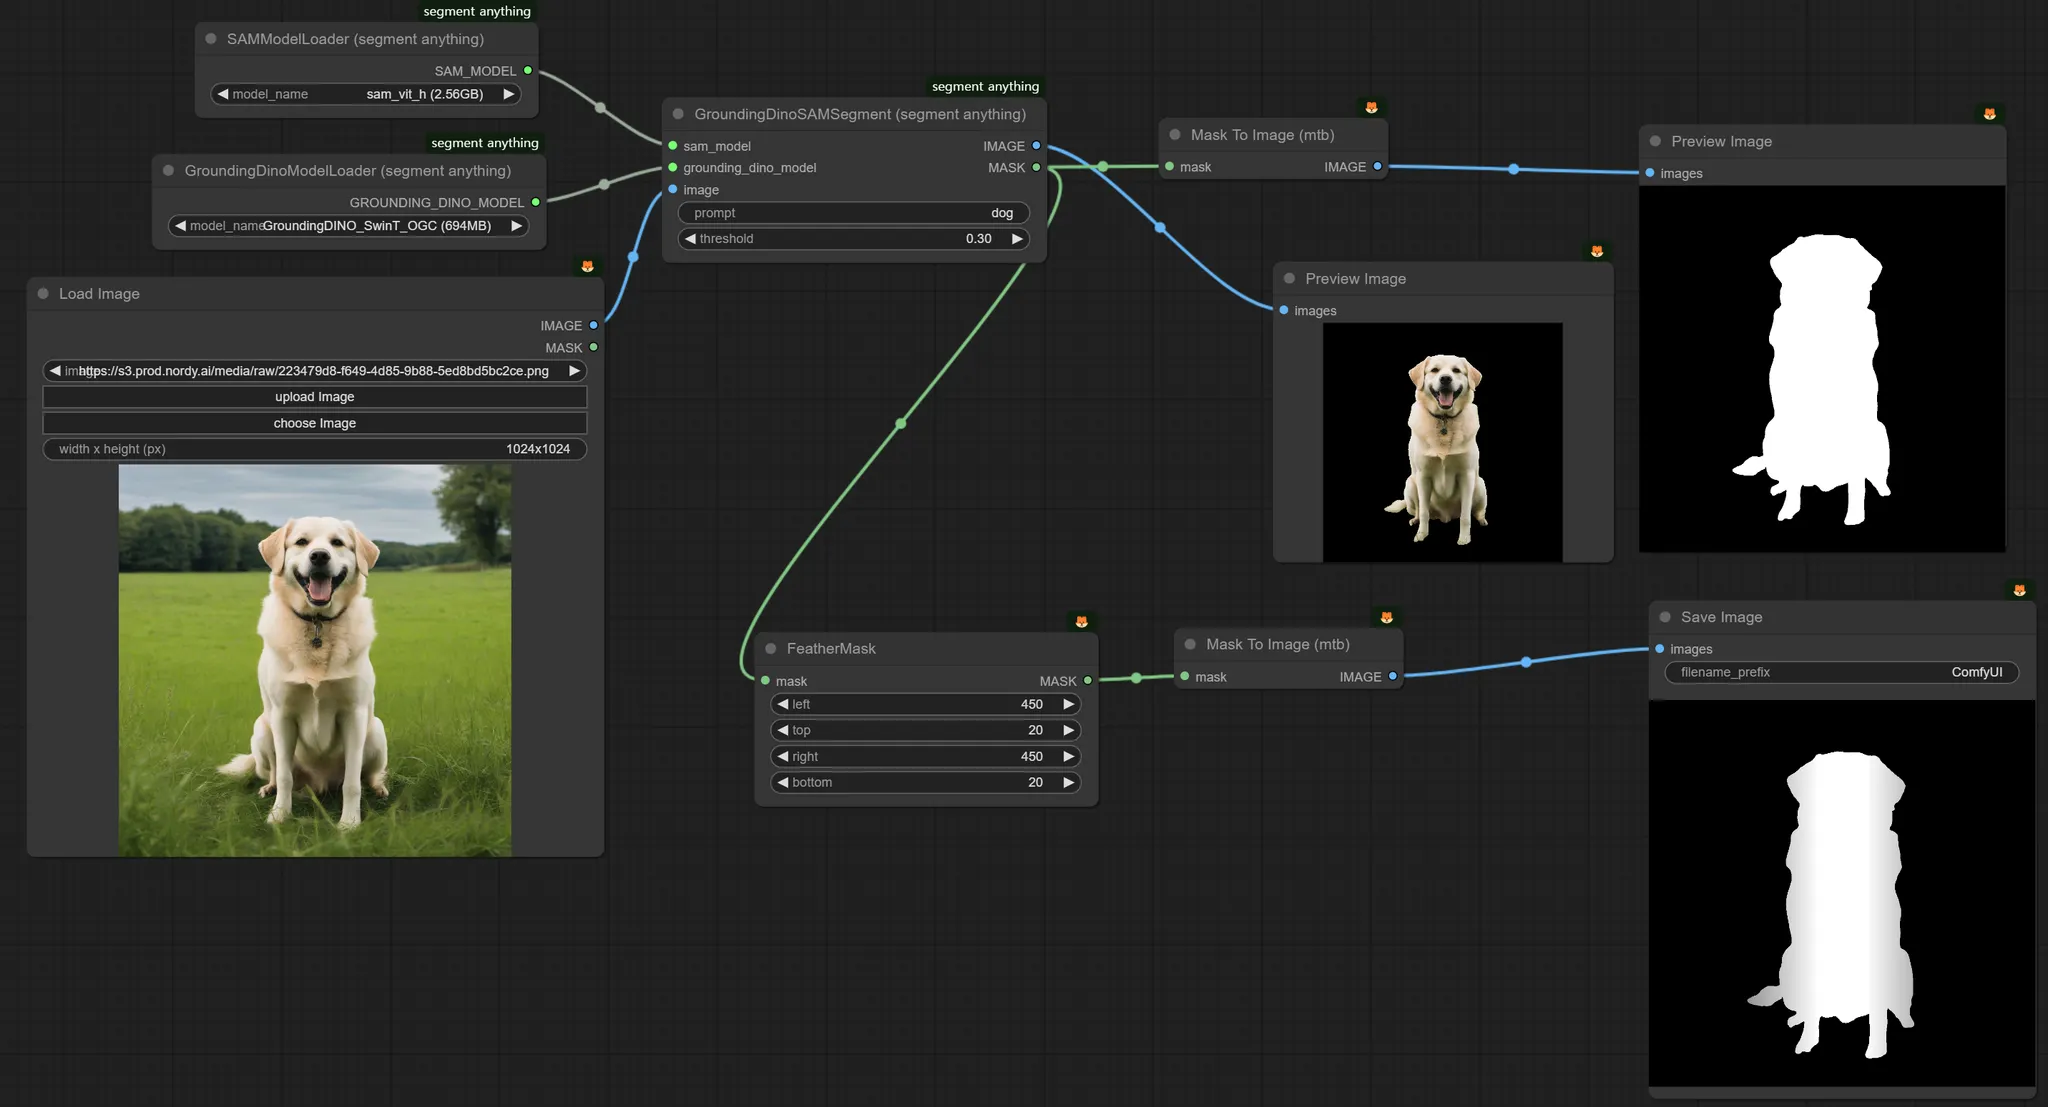
6.3.10. Feathering
Mask Feathering
Feathering softens the edges of the mask.
This can be done with the FeatherMask node. Adjust the left, top, right, and bottom values to control the extent of feathering.
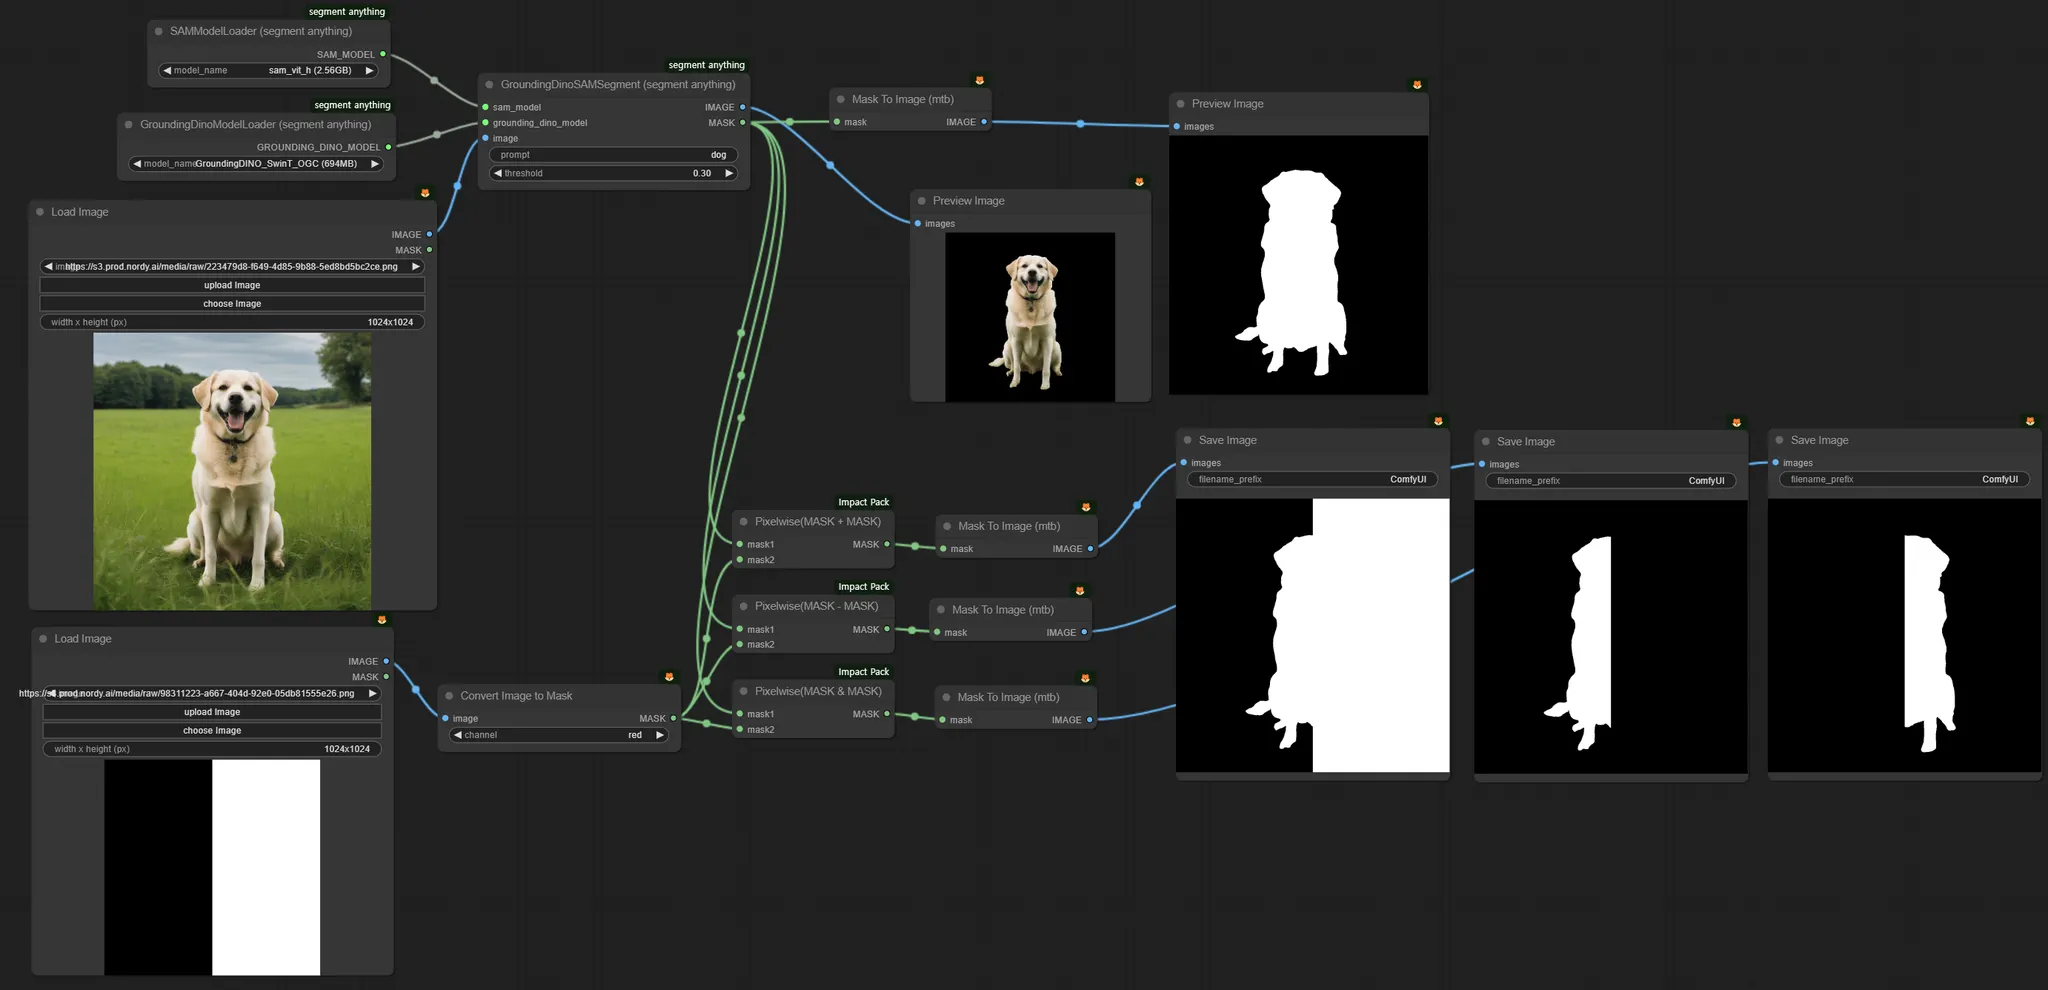
6.3.11. MaskOperation
Operation refers to arithmetic operations such as addition, subtraction, multiplication, and division.
This feature allows you to adjust mask areas through operations.
Use the Pixelwise node to perform +, -, and & operations to adjust the mask areas.
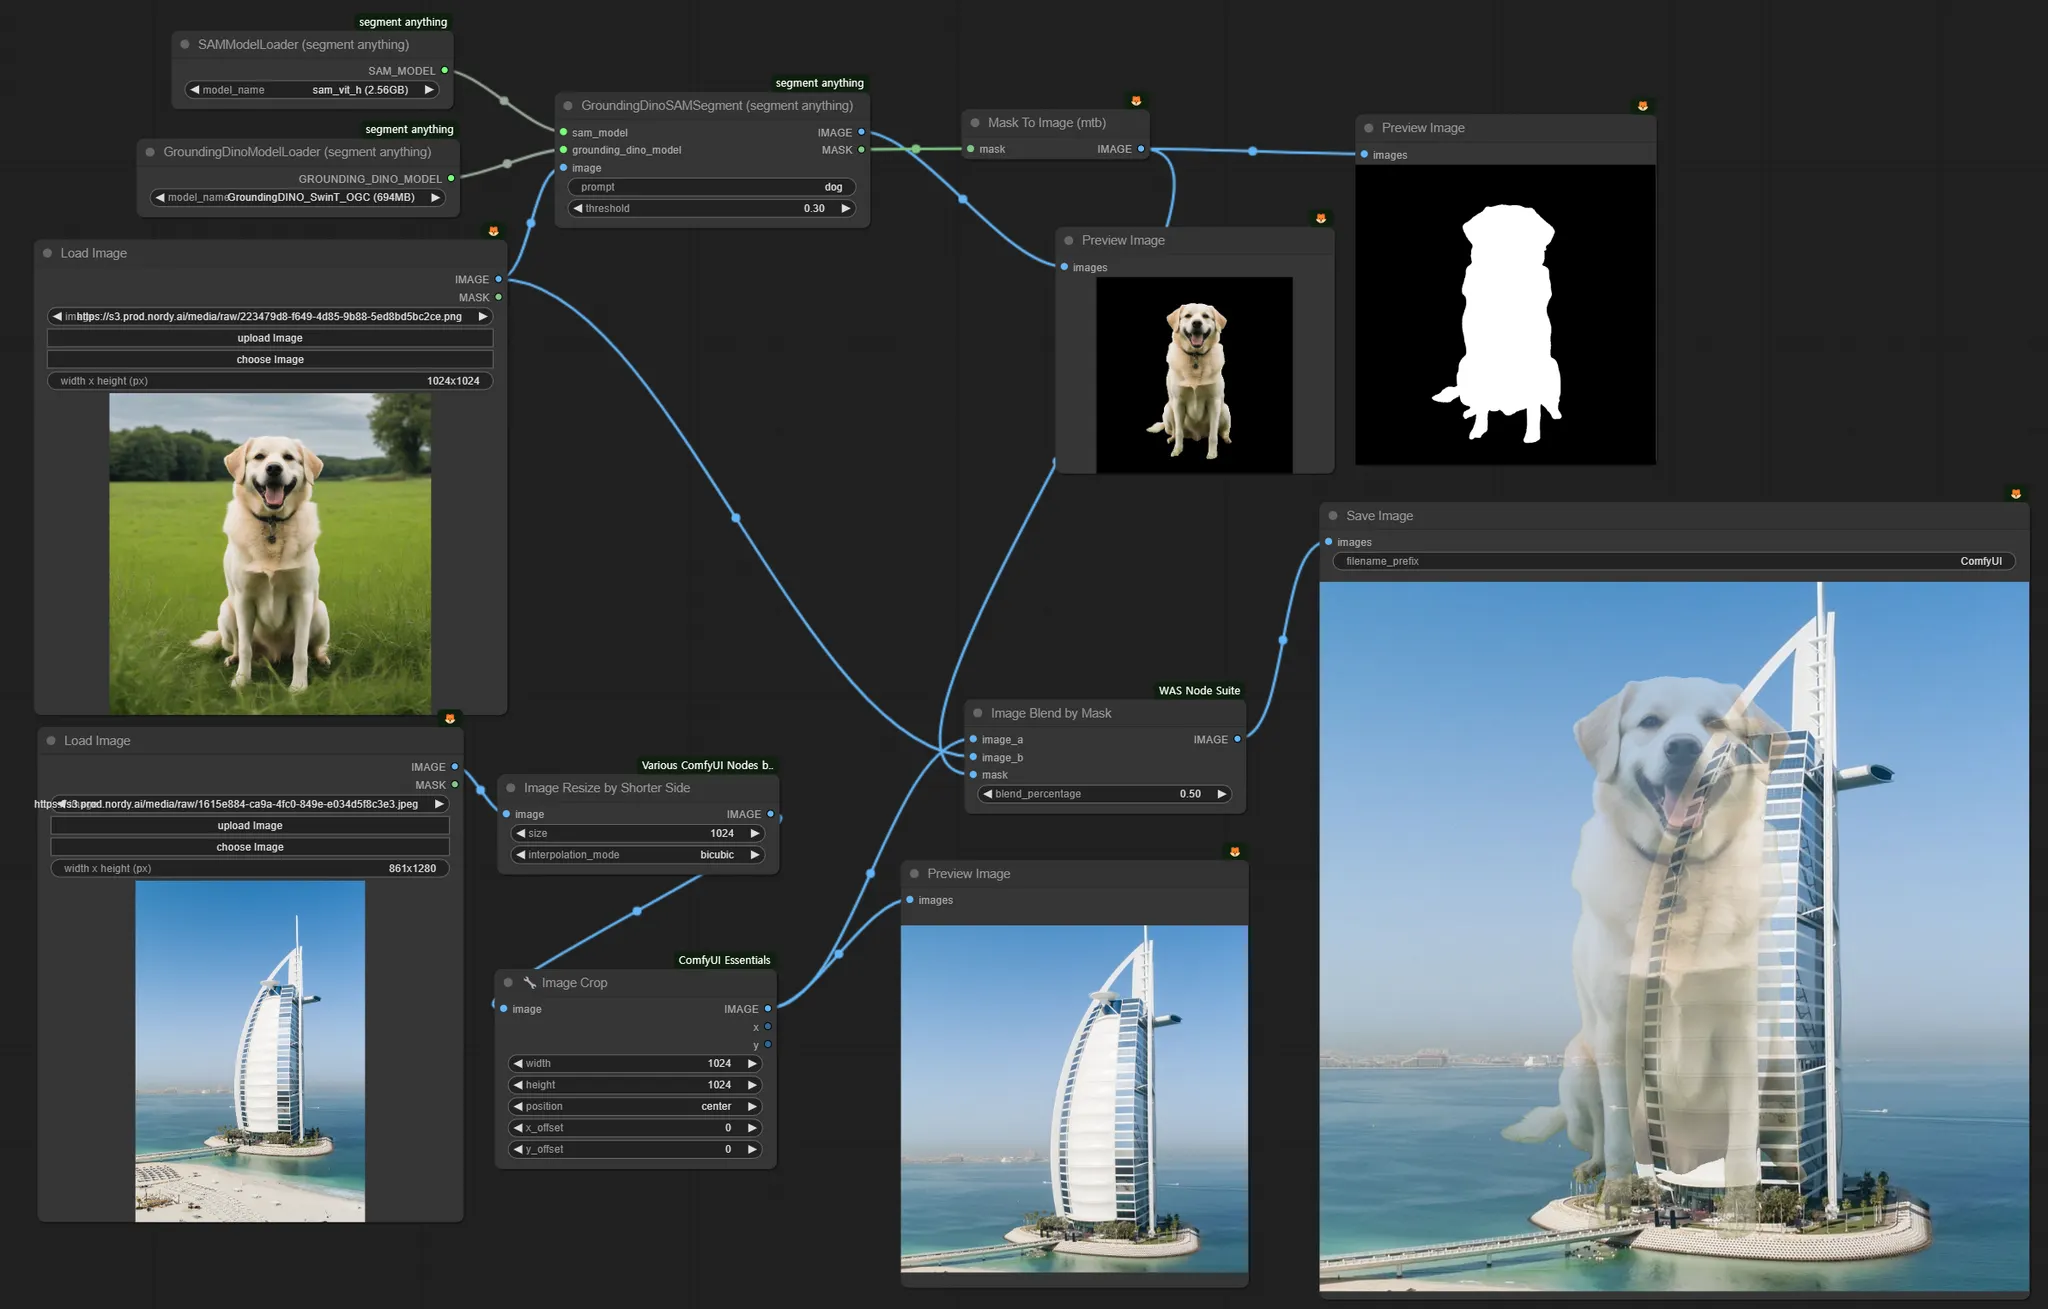
6.3.12. ImageBlendByMask
Use the mask to partially blend two images together.
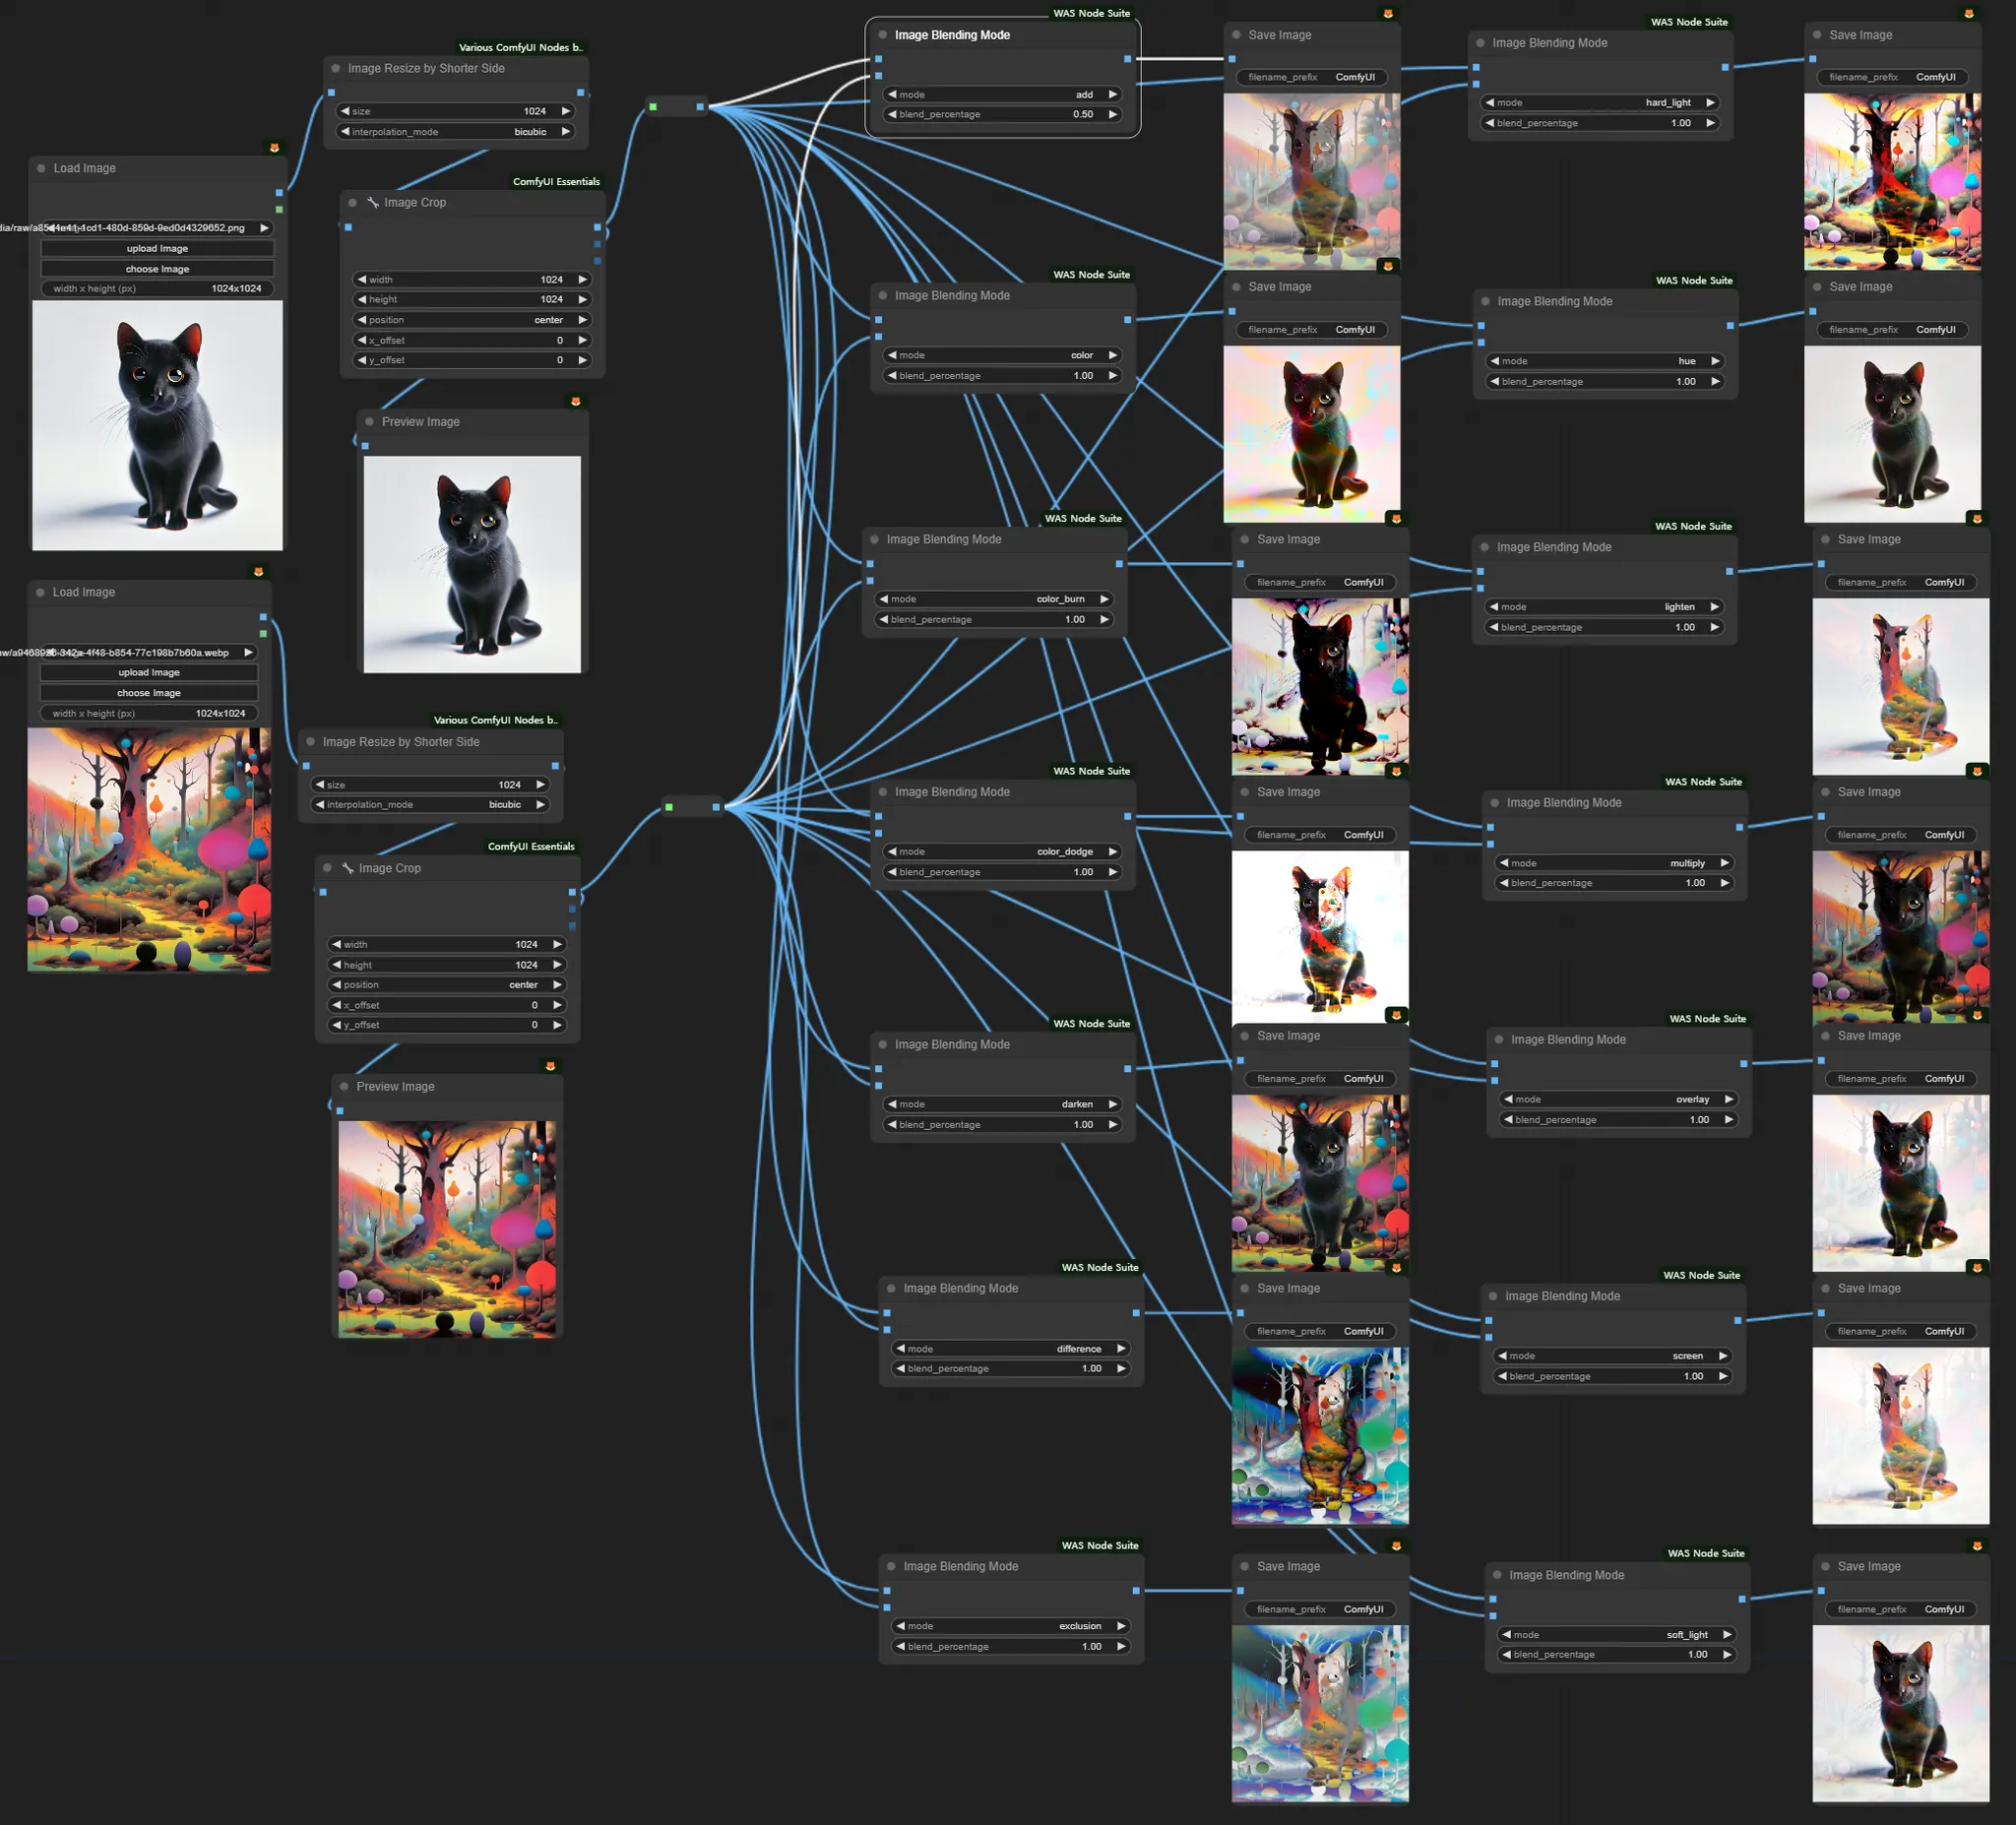
6.3.13. ImageBlendByMode
Blend images using various modes.

